Adding and managing Resources
Adding and managing Resources
With Roomzilla, your billing will be updated automatically, so feel free to add additional resources as you go.
This article will show you how to add Roomzilla-only resources and how to edit all resources in your account. To learn how to integrate your company’s Google Workspace or Microsoft 365 resource reservations with Roomzilla, please refer to the [Integrations section of our knowledge base].
Add and enable a new Resource
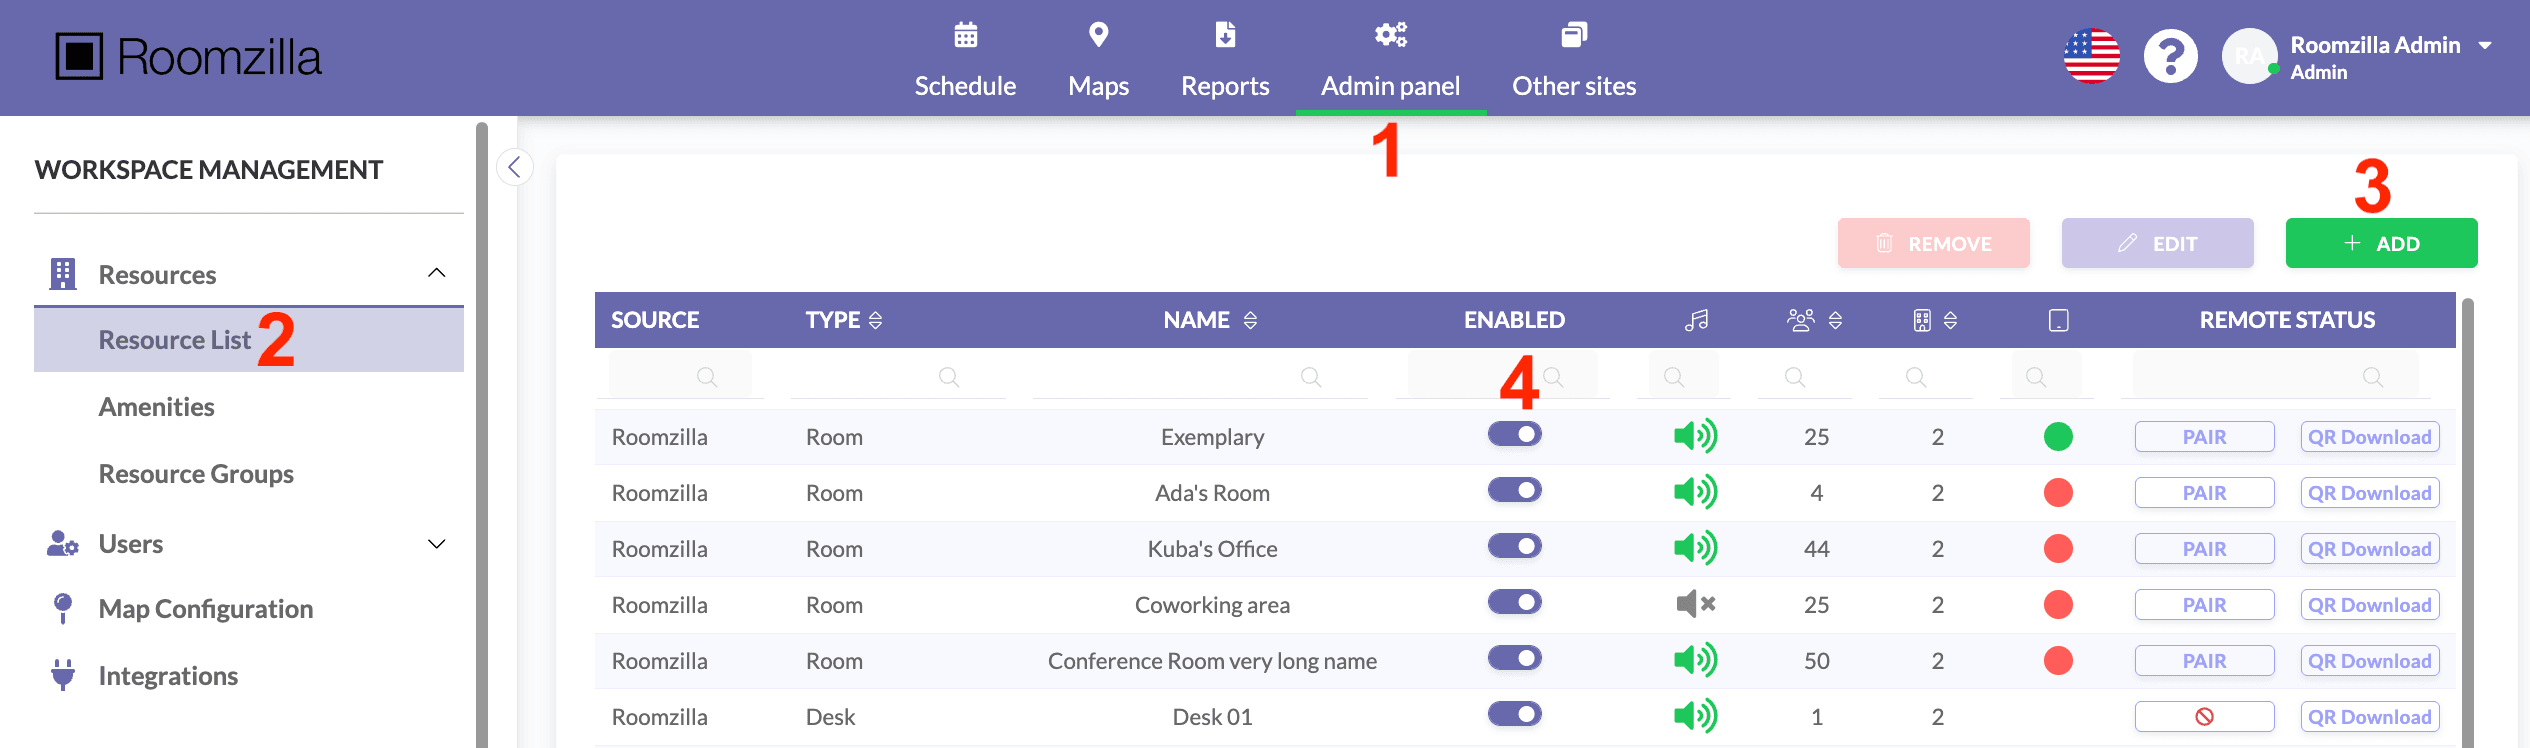
1. Log in to your admin user account and go to the Admin panel [1] > Resource list [2], where you will see the option to add [3]:
2. A window for adding a new resource will appear. Fill in the informational fields for your new Resource.
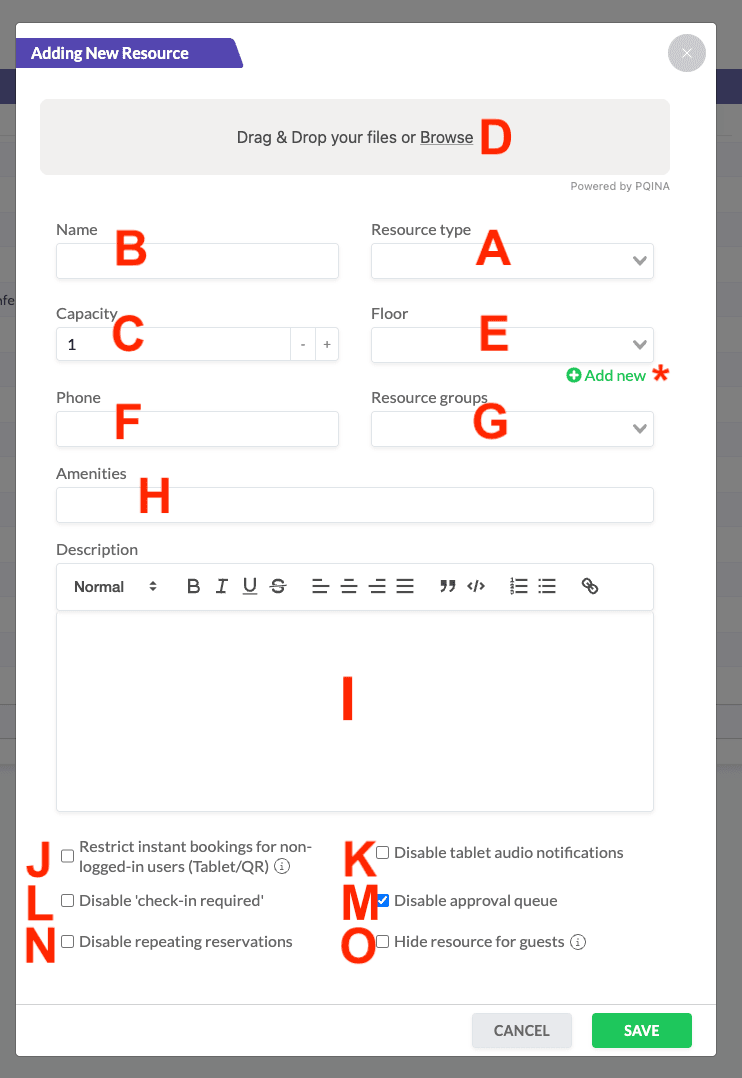
Some of the fields are required:
Resource type [A] – available types are Room, Desk, and Equipment. However, only a “Room” can be paired with a tablet (check out our article on [Room Displays] for more information). If you want to use tablets for desks or laboratory equipment, set them as the “Room” type.
Name [B] – this information will be displayed in the “Schedule” tab, on the connected tablet, and included in reminder emails.
Capacity [C] – informs how many people can attend a meeting hosted in this room or how many people can use the desk or equipment; it’s set to 1 by default.
Additional fields are optional and include:
Photo/s [D] – a picture of the Resource in .jpg, .jpeg, or .png format. It will be visible to Users in the daily schedule view and during reservation creation. Multiple images can be uploaded for each resource.
Floor [E] – for each resource, select a floor number from the list or add a new floor number/name [*] to allow users to sort resources by this parameter on the home page. Additionally, this information is essential for correctly setting up the interactive maps. For more details, please refer to [our article on map setup].
Phone [F] – enter the number of the phone connected in the room (if any).
[Resource Groups] [G] – must be added in ‘Resource Groups’ first. Grouped Resources will be kept together in your daily schedule and can be quickly collapsed or expanded for a clearer view.
[Amenities] [H] – before you can tag a resource, you need to add the amenities in the Amenities sub-tab with the Admin panel tab. This lets users search for resources with the particular amenities they need.
Description [I] – description of a resource visible to users, limited to 2500 characters. You can link email addresses, websites, or support pages. Simply highlight the text you would like to link, then click on the Link Icon and hit save (if the text is lengthy, the confirmation window will be displayed at the top of the text field).
You’ll also notice checkboxes at the bottom; the display order may vary:
J – tick this box to allow creating reservations only by logged-in users. The “Use Now” button won’t be displayed on the tablet, but you can [display] or [print] a QR code to still allow for impromptu meetings. This option is available only for the “room” resource type.
K – ticking this box will mute sound notifications on the tablet connected to the particular Resource. This option is available only for the “room” resource type.
L – this box allows you to disable obligatory check-in for the particular Resource, so that missed reservations will not be auto-canceled.
M – this box will appear only if the [“Approval Queue” feature] is enabled for your account:
- Check the box if you do not require admin approval for reservations created by users for this specific resource.
- Uncheck the box if you want your admin users to receive notifications of reservation requests for that resource and have the option to accept or reject them.
N – check this box to remove the repeat option from the reservation creation/edition window for that resource. This option is available only if the [“Enable repeating reservations“] box is checked in account settings.
O – check this box to display this resource only to logged-in users. Guests will not be able to see this resource’s schedule. This option is available only if the [“Enable repeating reservations“] box is checked in account settings.
3. Click “Save” at the bottom of the modal to finish creating your Room or Other Resource.
4. Make sure your new Resource is enabled – the toggle must be ticked [4]; only then will it be visible in the “Schedule” and available for your Users to book.
Edit details of your existing Resource
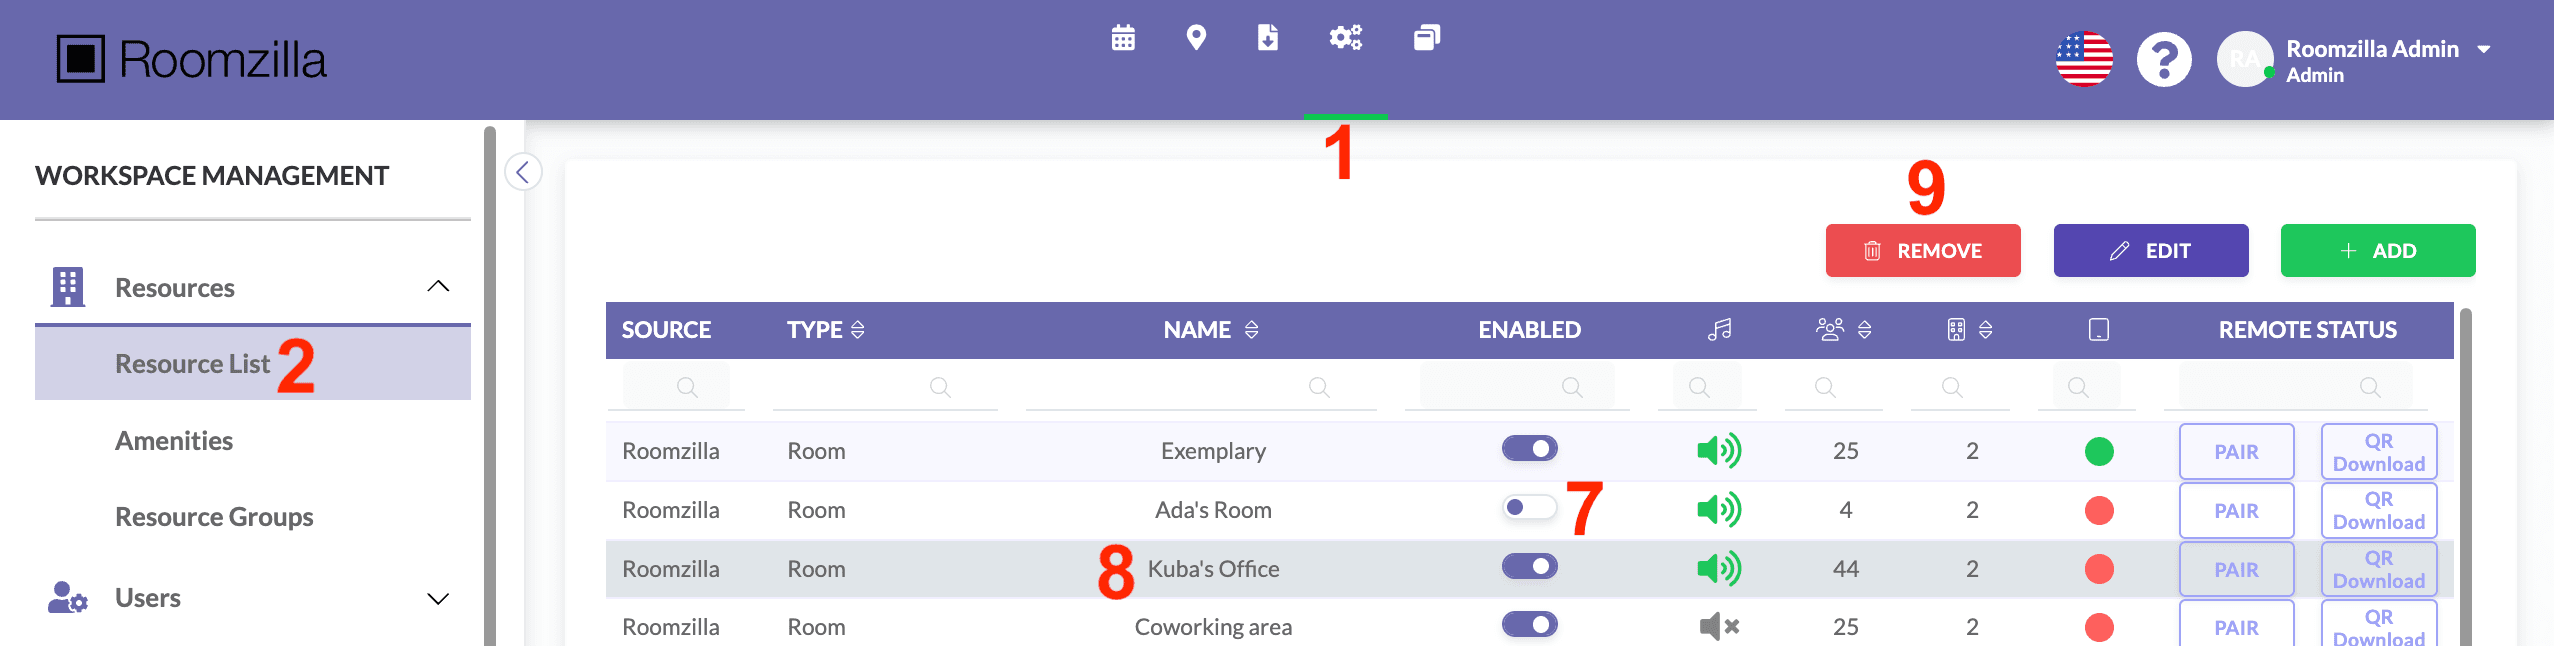
1. In the “Resources List” sub-tab [2], click on the Resource you want to have updated [5] and hit “Edit” [6].
2. A “Details” window will appear with the same options as the example above. Update the necessary fields and click “Save” to confirm changes.

Deleting or disabling a Resource
If you temporarily don’t need a resource, go to the Resources tab [2] in the Admin section [1] and simply disable it by switching the toggle off [7]. All details, along with past and future reservations, will be saved, and you can re-enable the resource at any time.
If you no longer need a resource at all, select it from the list [8] and use the Remove button [9] to delete it completely. Be aware that this will delete all future reservations. While the booking history will still be available in the Reports tab, the Resource name column will be empty.