Creating and applying Amenities
Creating and applying Amenities
Adding Amenities will allow your Users to find out what your Resources contain.
Create and manage your Amenities
1. Go to: Admin panel [1] > Amenities [2] on the left panel. Here you will be able to manage [3] your Amenities:
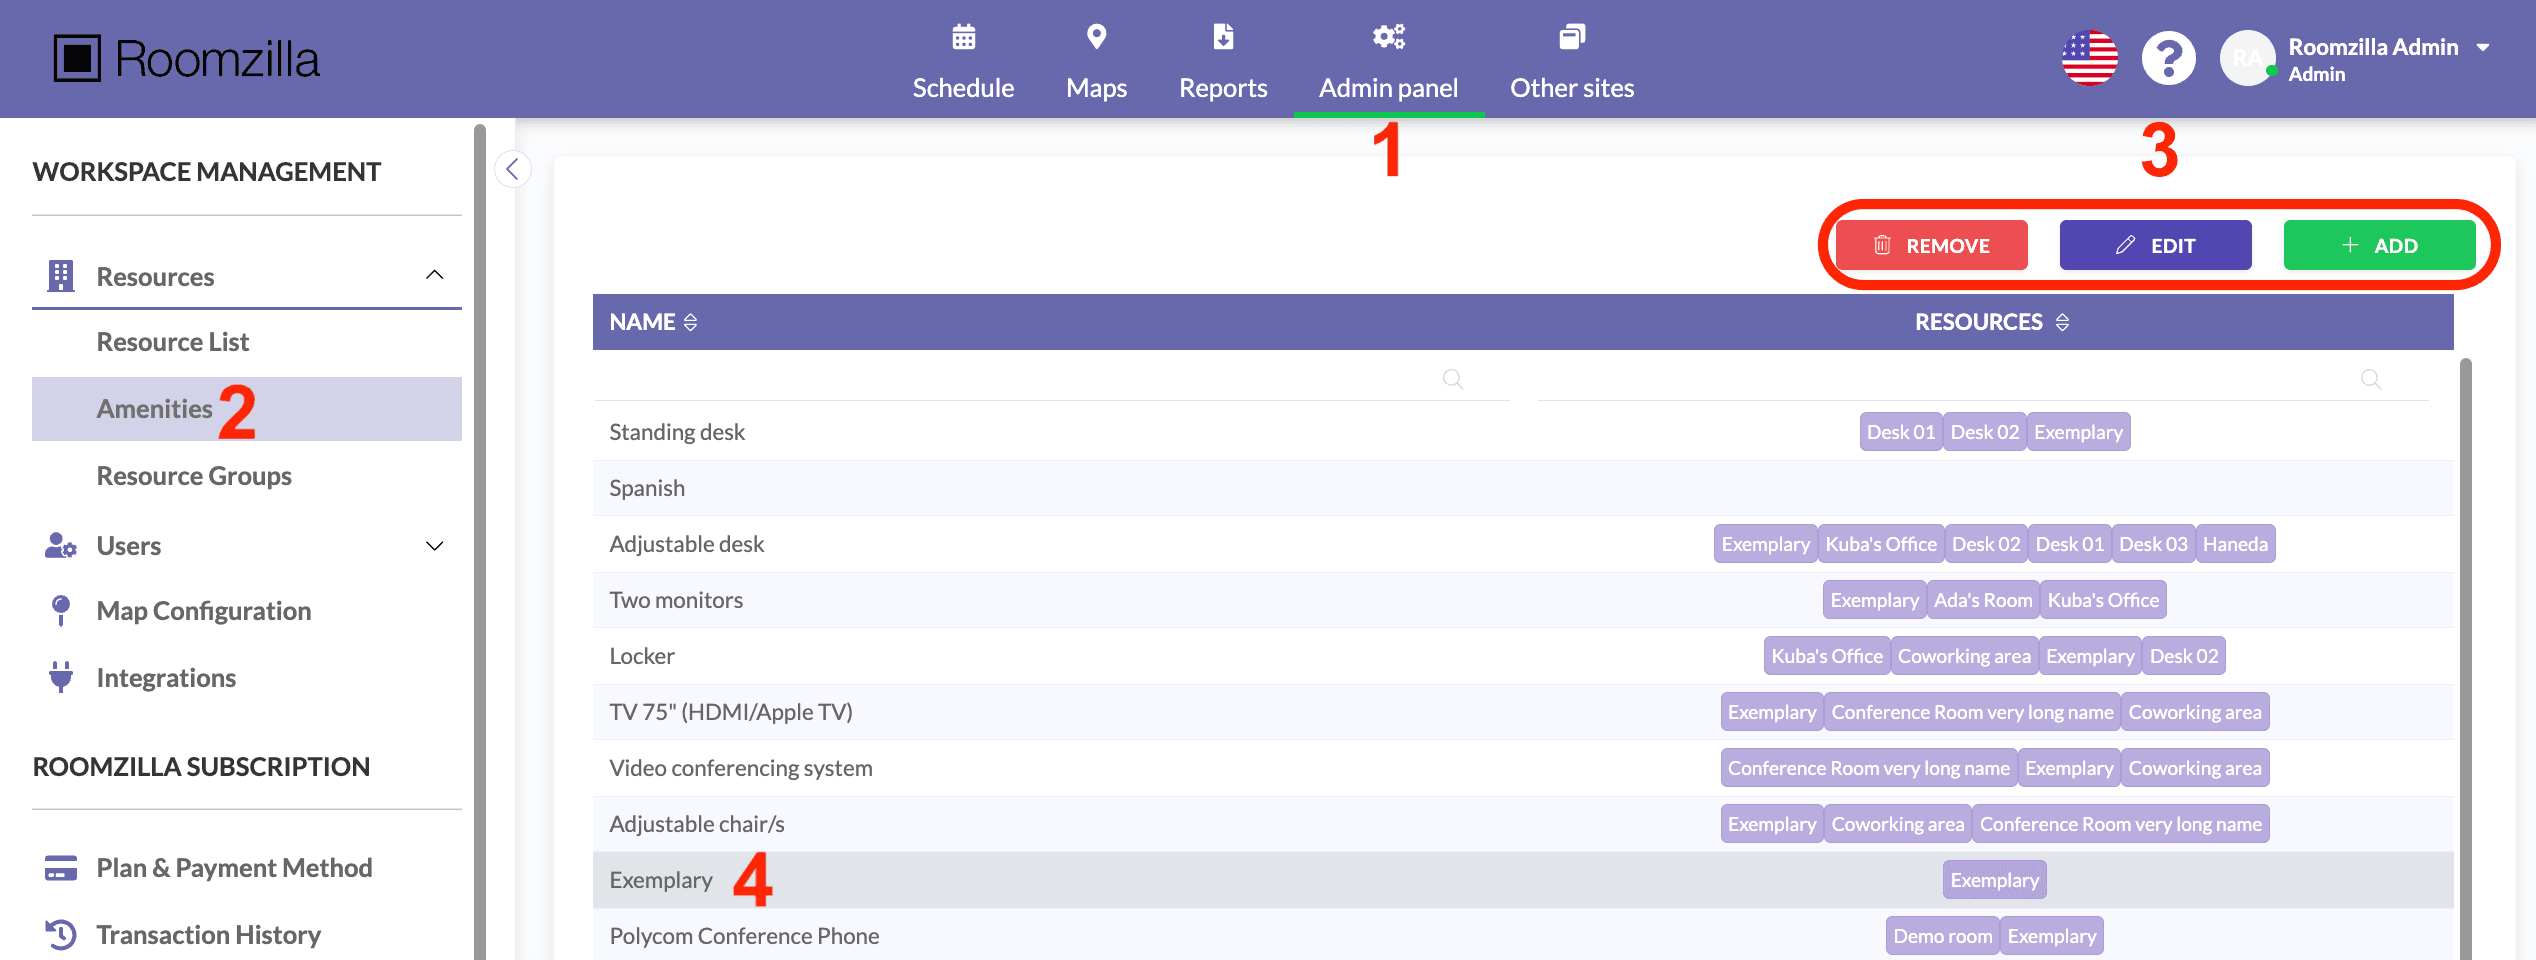
- Add – simply enter the name of your Amenity (maximum 29 characters) and hit Save:

- Edit – select [4] any of the existing Amenities and edit its name:

- Delete – as you can imagine, this will delete the selected Amenity.
Apply Amenities to the Resources
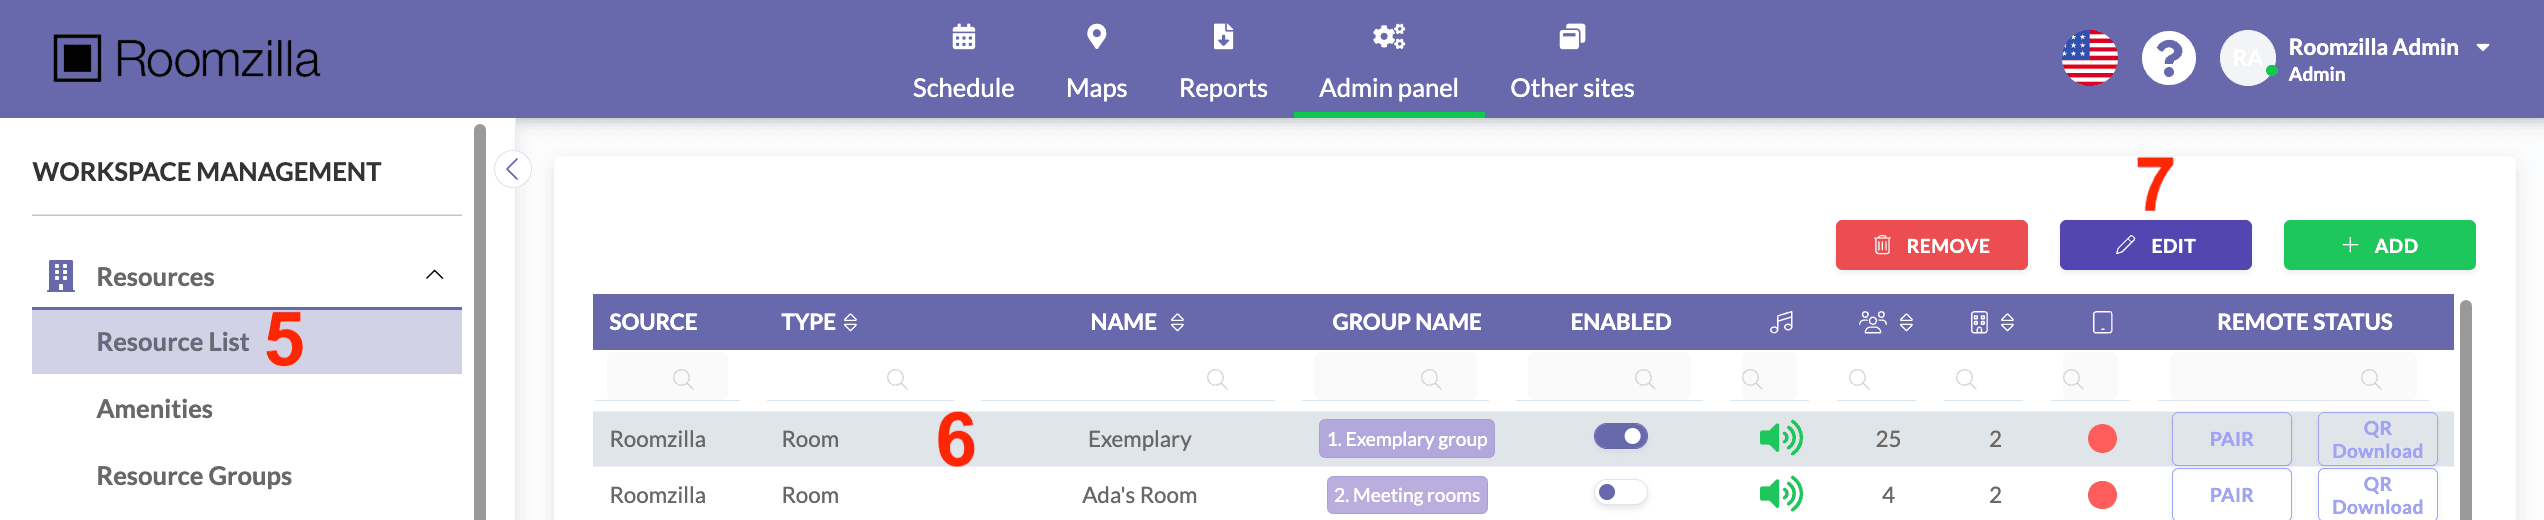
1. Now head to your Resource List [5], select the Resource you want to add your Amenities to [6], and hit “Edit” [7]:
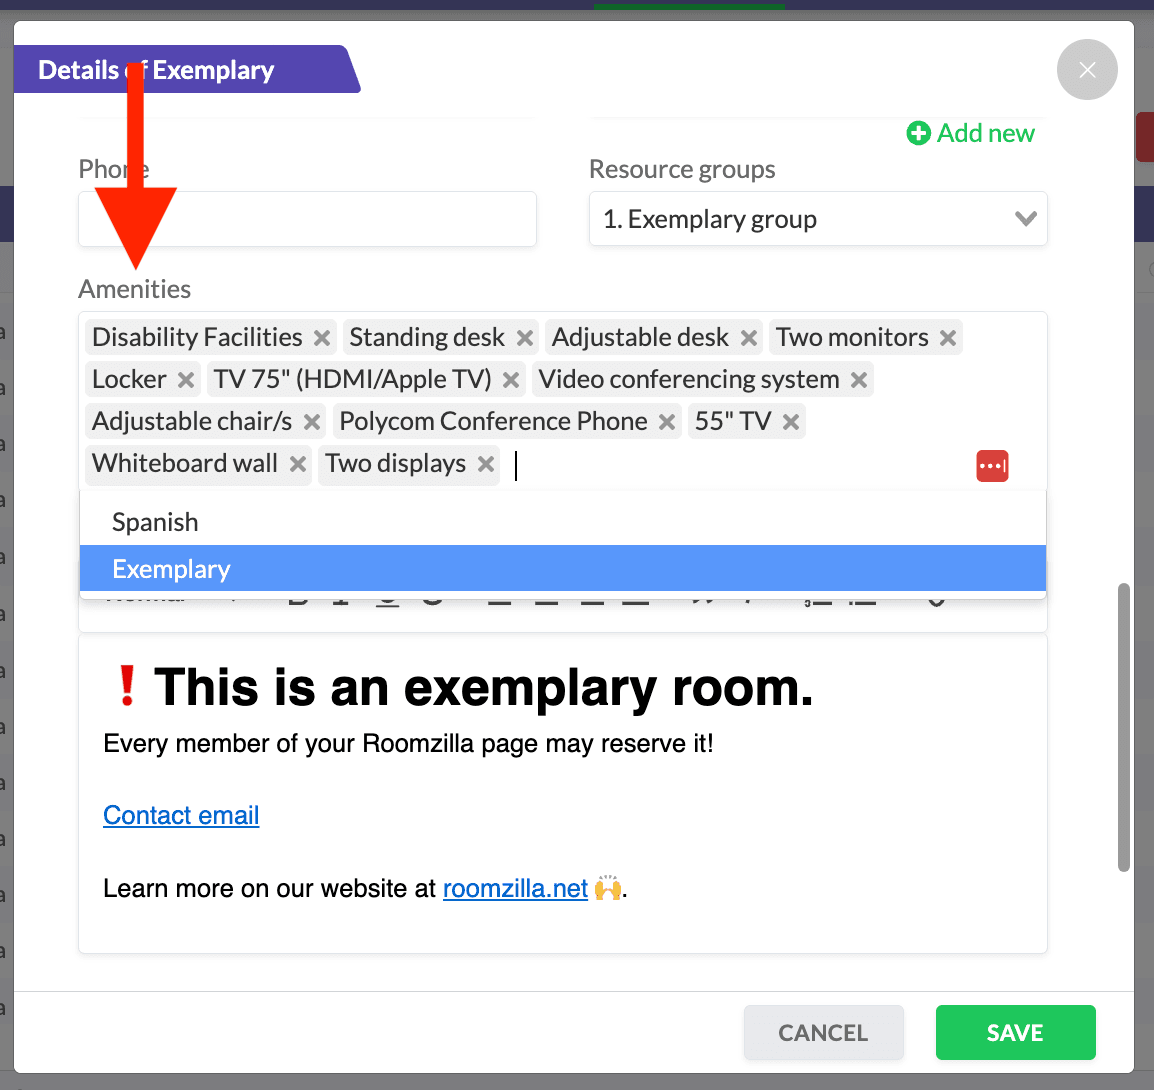
2. You may need to scroll down to see the Amenities option. Select the box and apply the created Amenities from the drop-down list.
3. Click Save to confirm changes.
Now that you have created and applied Amenities, they will be available in the “Schedule” tab [1] for all Users:
- hover the mouse over a particular Resource name [2] to see what Amenities it contains [3]
- filter out any Resources that do not have the desired Amenity [4]
