Interactive Maps setup
Setting up interactive Maps
The “Maps” tab allows you to showcase the space, assist users with navigation, and enable them to make reservations directly from the map.
Maps are also accessible in a dedicated tab on the Roomzilla mobile version for viewing only. They are currently non-interactive and serve solely as visual aids without the option to make reservations.
You can display multiple floor plans—either from those already in your account or by adding a new floor.
Floor images must be in .jpg, .jpeg, or .png format.
For creating simple floor plans, free tools like Planner 5D, Floorplanner, RoomSketcher, and HomeByMe are great options. They allow quick designs and easy exports.
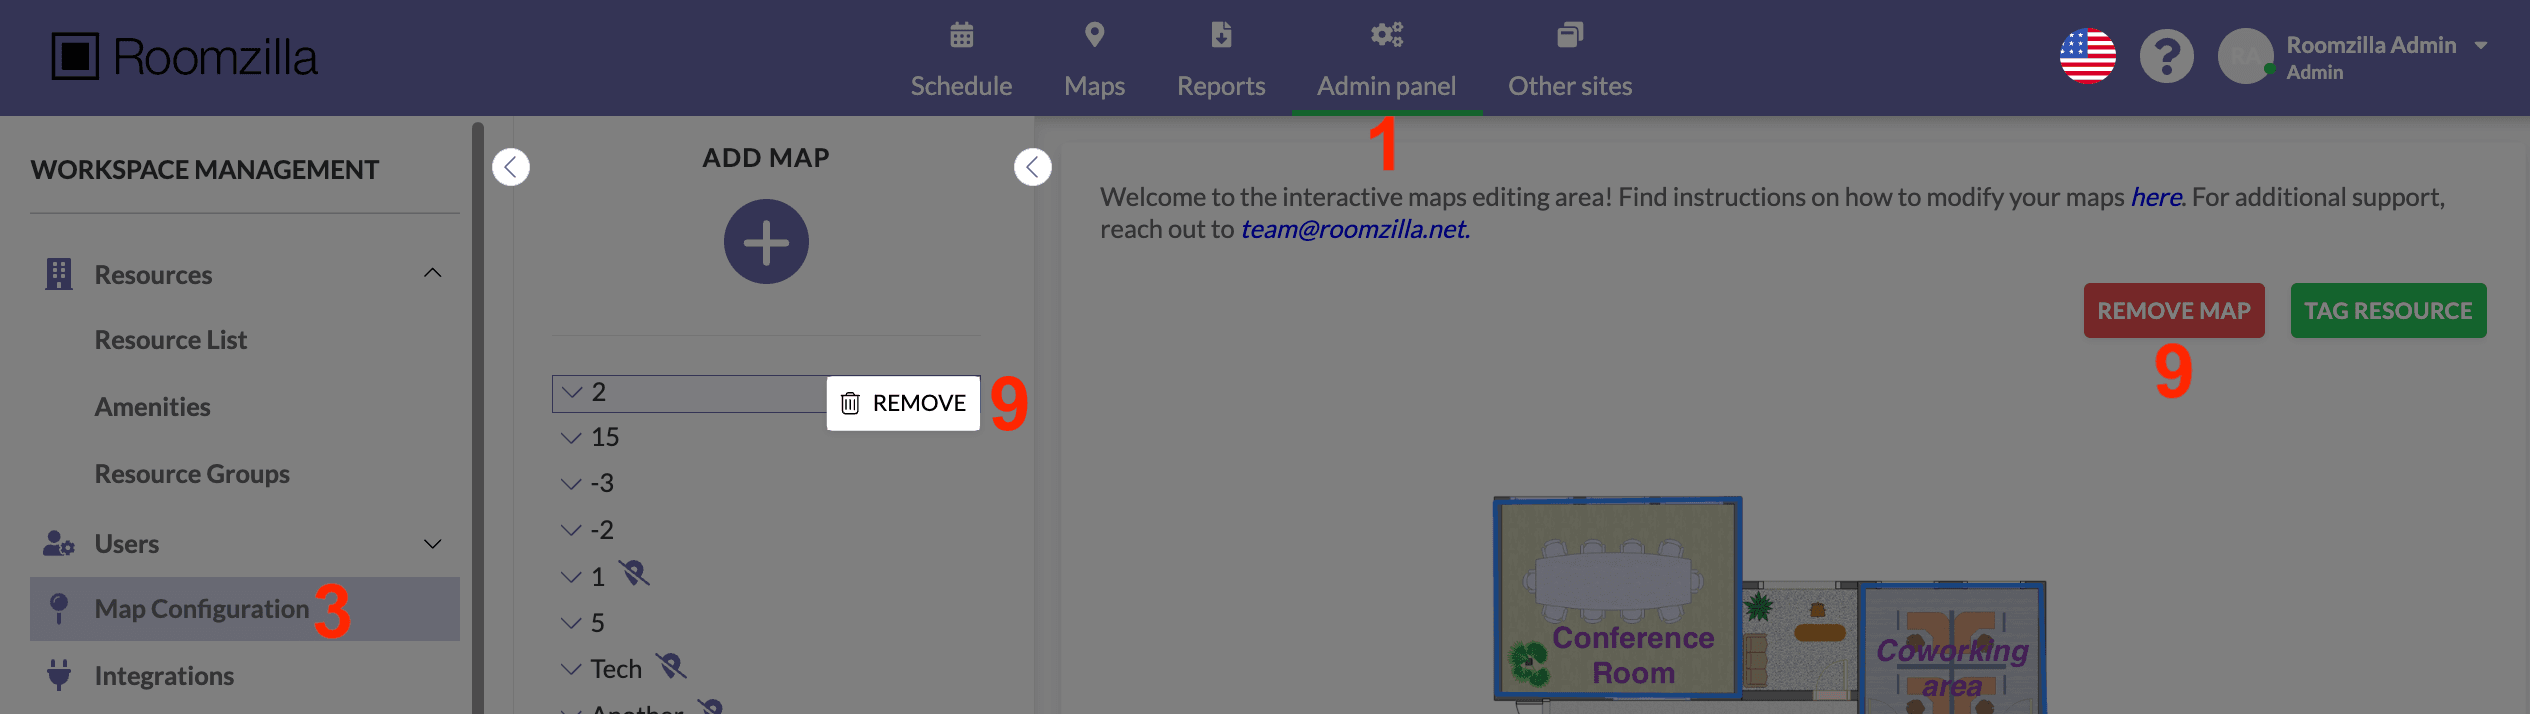
1. First, go to Admin panel [1] > Resource List [2] to ensure that all your resources are added and assigned to the correct floors. For more details, refer to our article on managing resources.
2. Then, select the Map Configuration section [3].
3. Click the “Add Map” button [4] to assign the map to an existing floor or select one from the list [5].
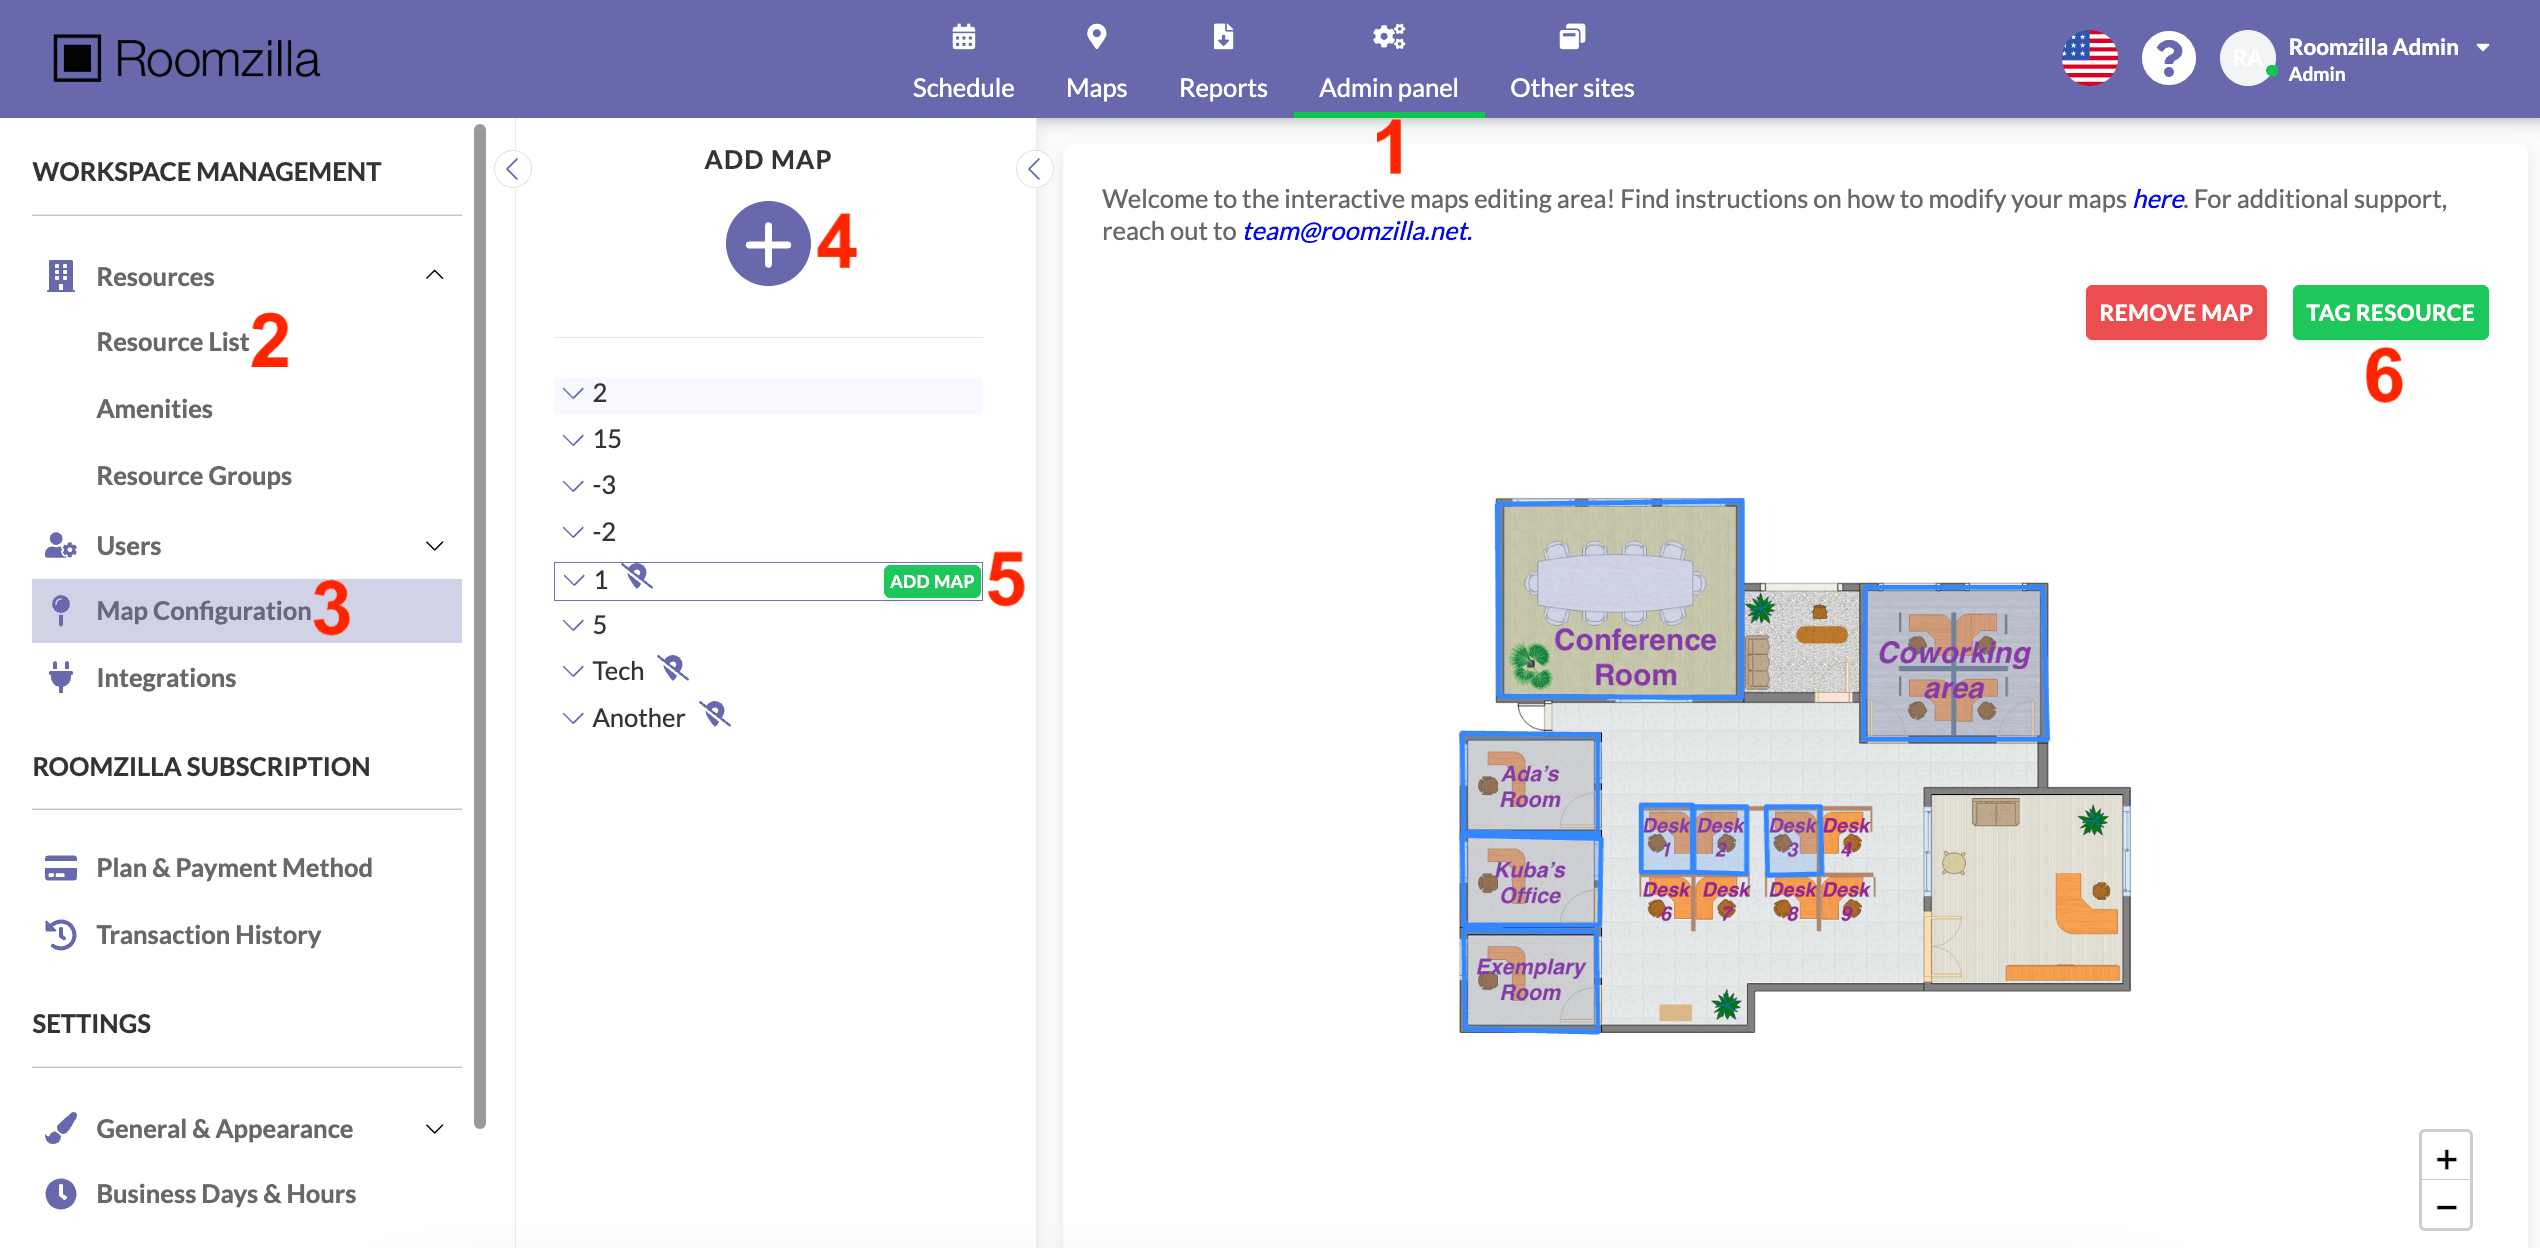
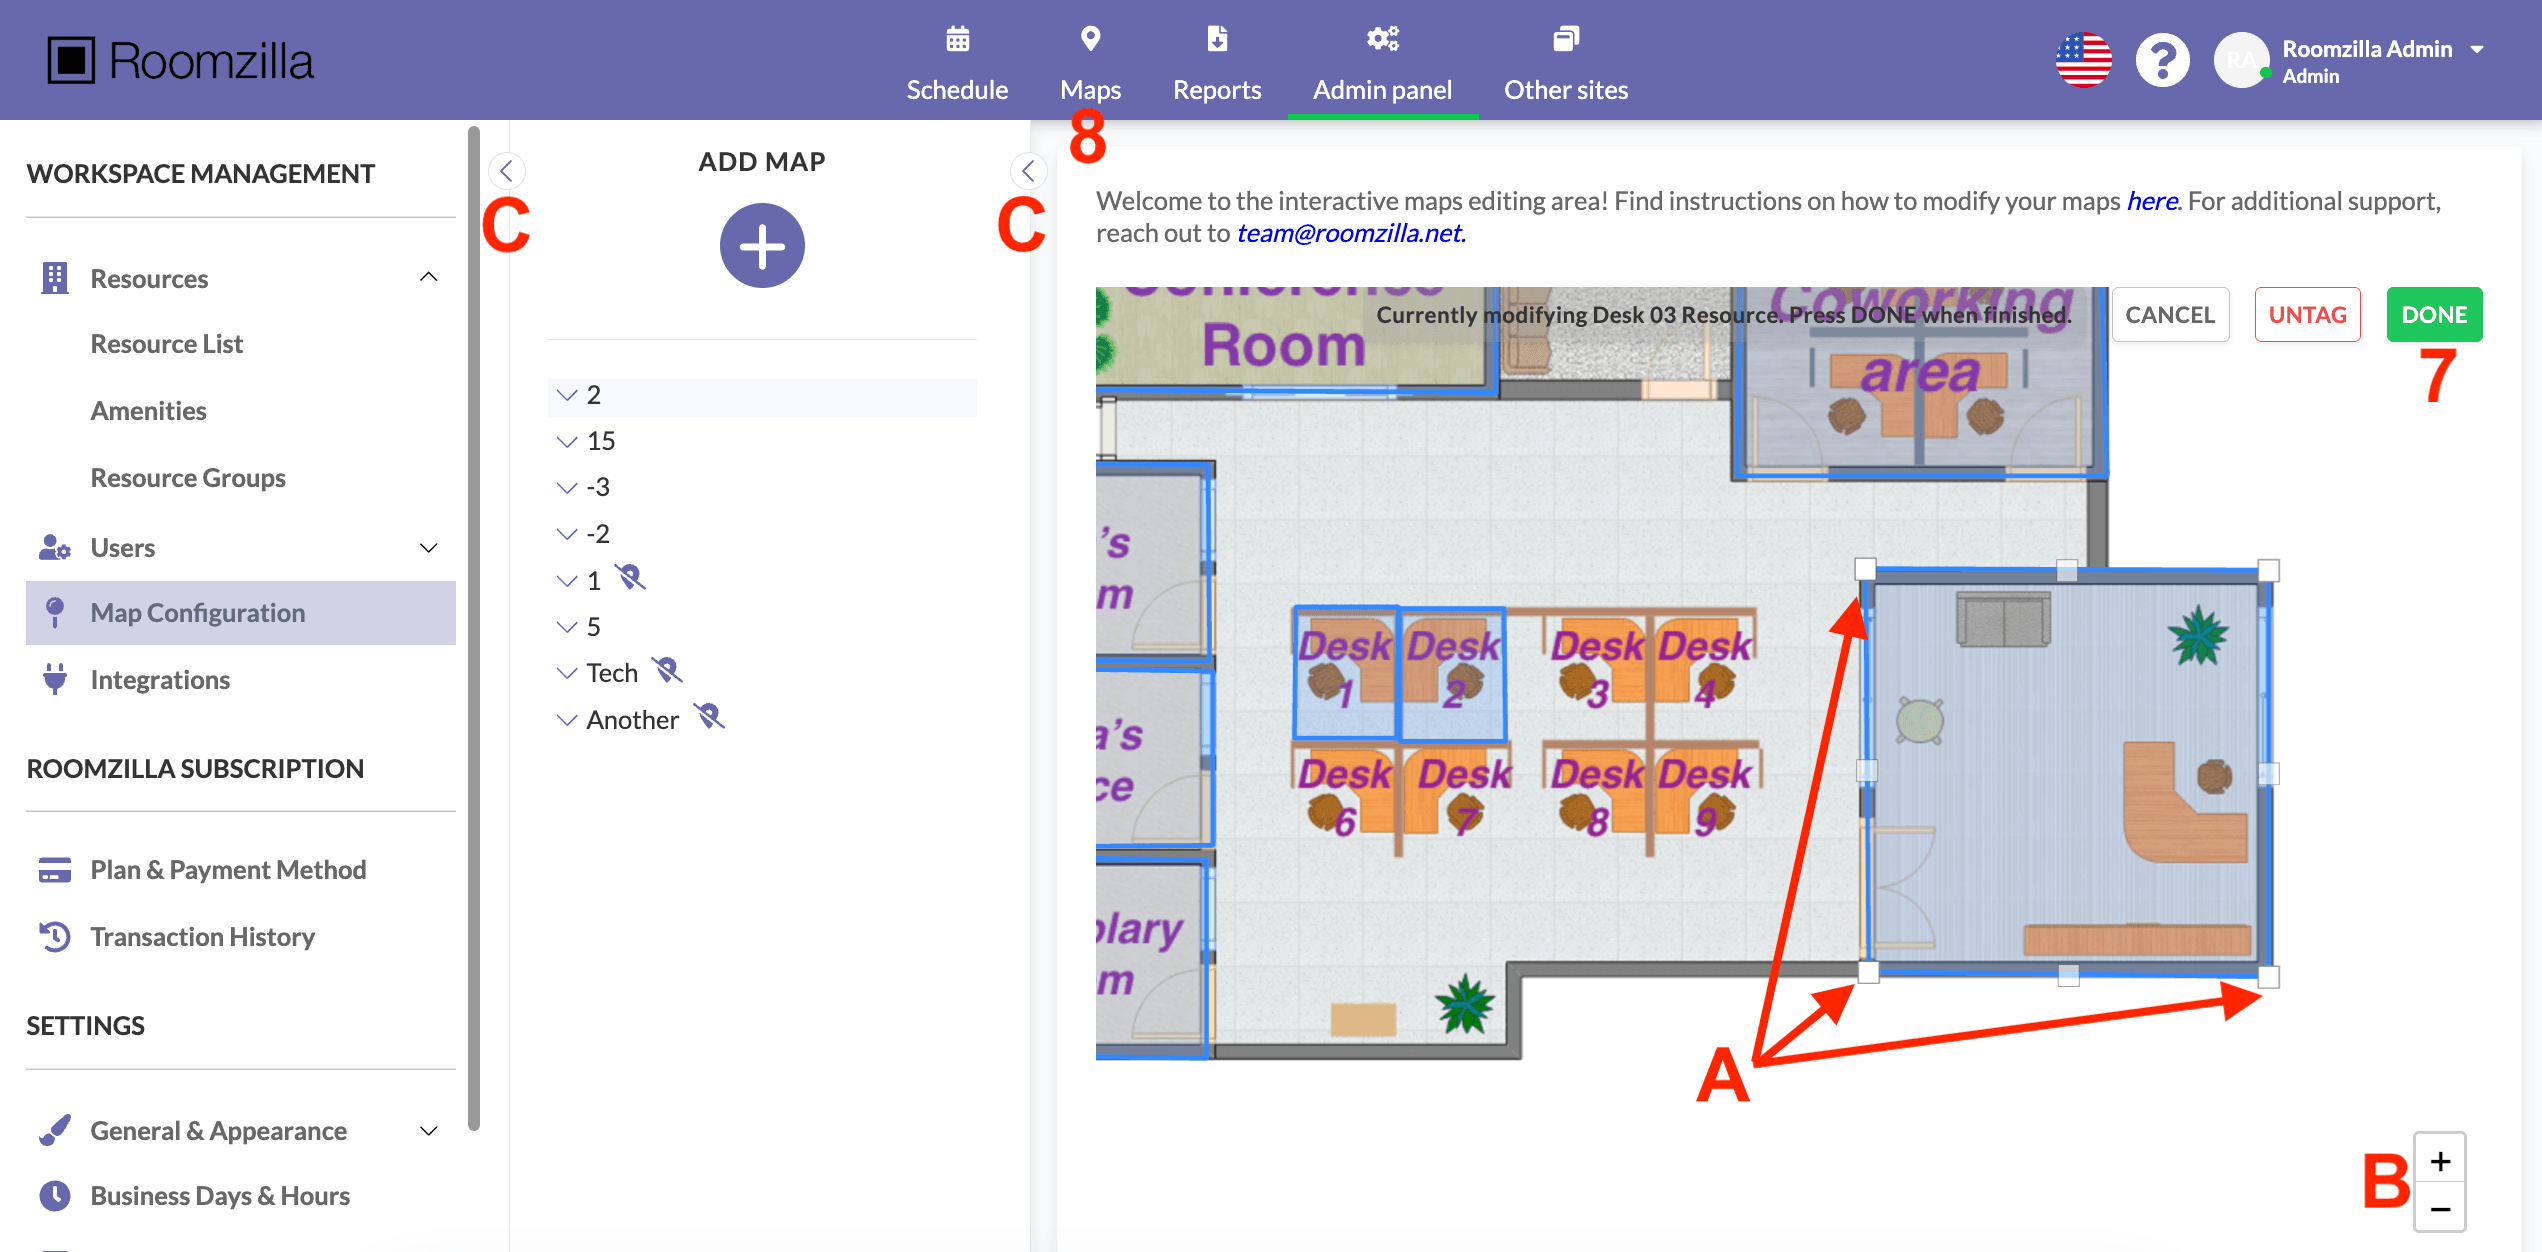
4. Click the “Tag Resource” button [6] to mark the selected floor’s resource on the map.
- Use your mouse to draw the shape; each click will place a corner marker [A].
- Click on the first marker again to close the shape and save the resource on the map, or press “Done” [7] to save it.
- Zoom in and out using your mouse or the buttons [B] for a clearer view and more precise marking. Hide left panels for more space [C].
- If needed, adjust the shape by dragging the markers with your mouse.
- Once finished, press “Done” [7] —your users will now be able to search for and book this resource directly from the “Maps” tab [8].
5. Repeat step 4 for the remaining resources. To adjust the shape of any resource, click on it to start editing.
Removing or updating the map
If you need to tag any new resources on the existing map, navigate to Admin panel [1] > Map Configuration section [3]. Select the appropriate map by clicking on it in the floor list, and follow the instructions provided in step 4 above.
To delete or update the entire map image, select the correct one from the list, click on the three dots menu in the corresponding row for that floor, and choose “Remove” [9]. Please note that this action will also delete any resource tags associated with the map. Afterward, you can upload the new image [4,5] and tag all resources from scratch [6, A, 7].