Check-in and Auto-Cancelation
Check-in and Auto-Cancelation
When the Check-in option is enabled, all reservations will require an arrival confirmation from the host or a participant. If a booking is not checked in, Auto-Cancelation will automatically remove the reservation after a set time. This frees up the resource for others and ensures you get the most out of your space.
Step 1: Activate Check-in
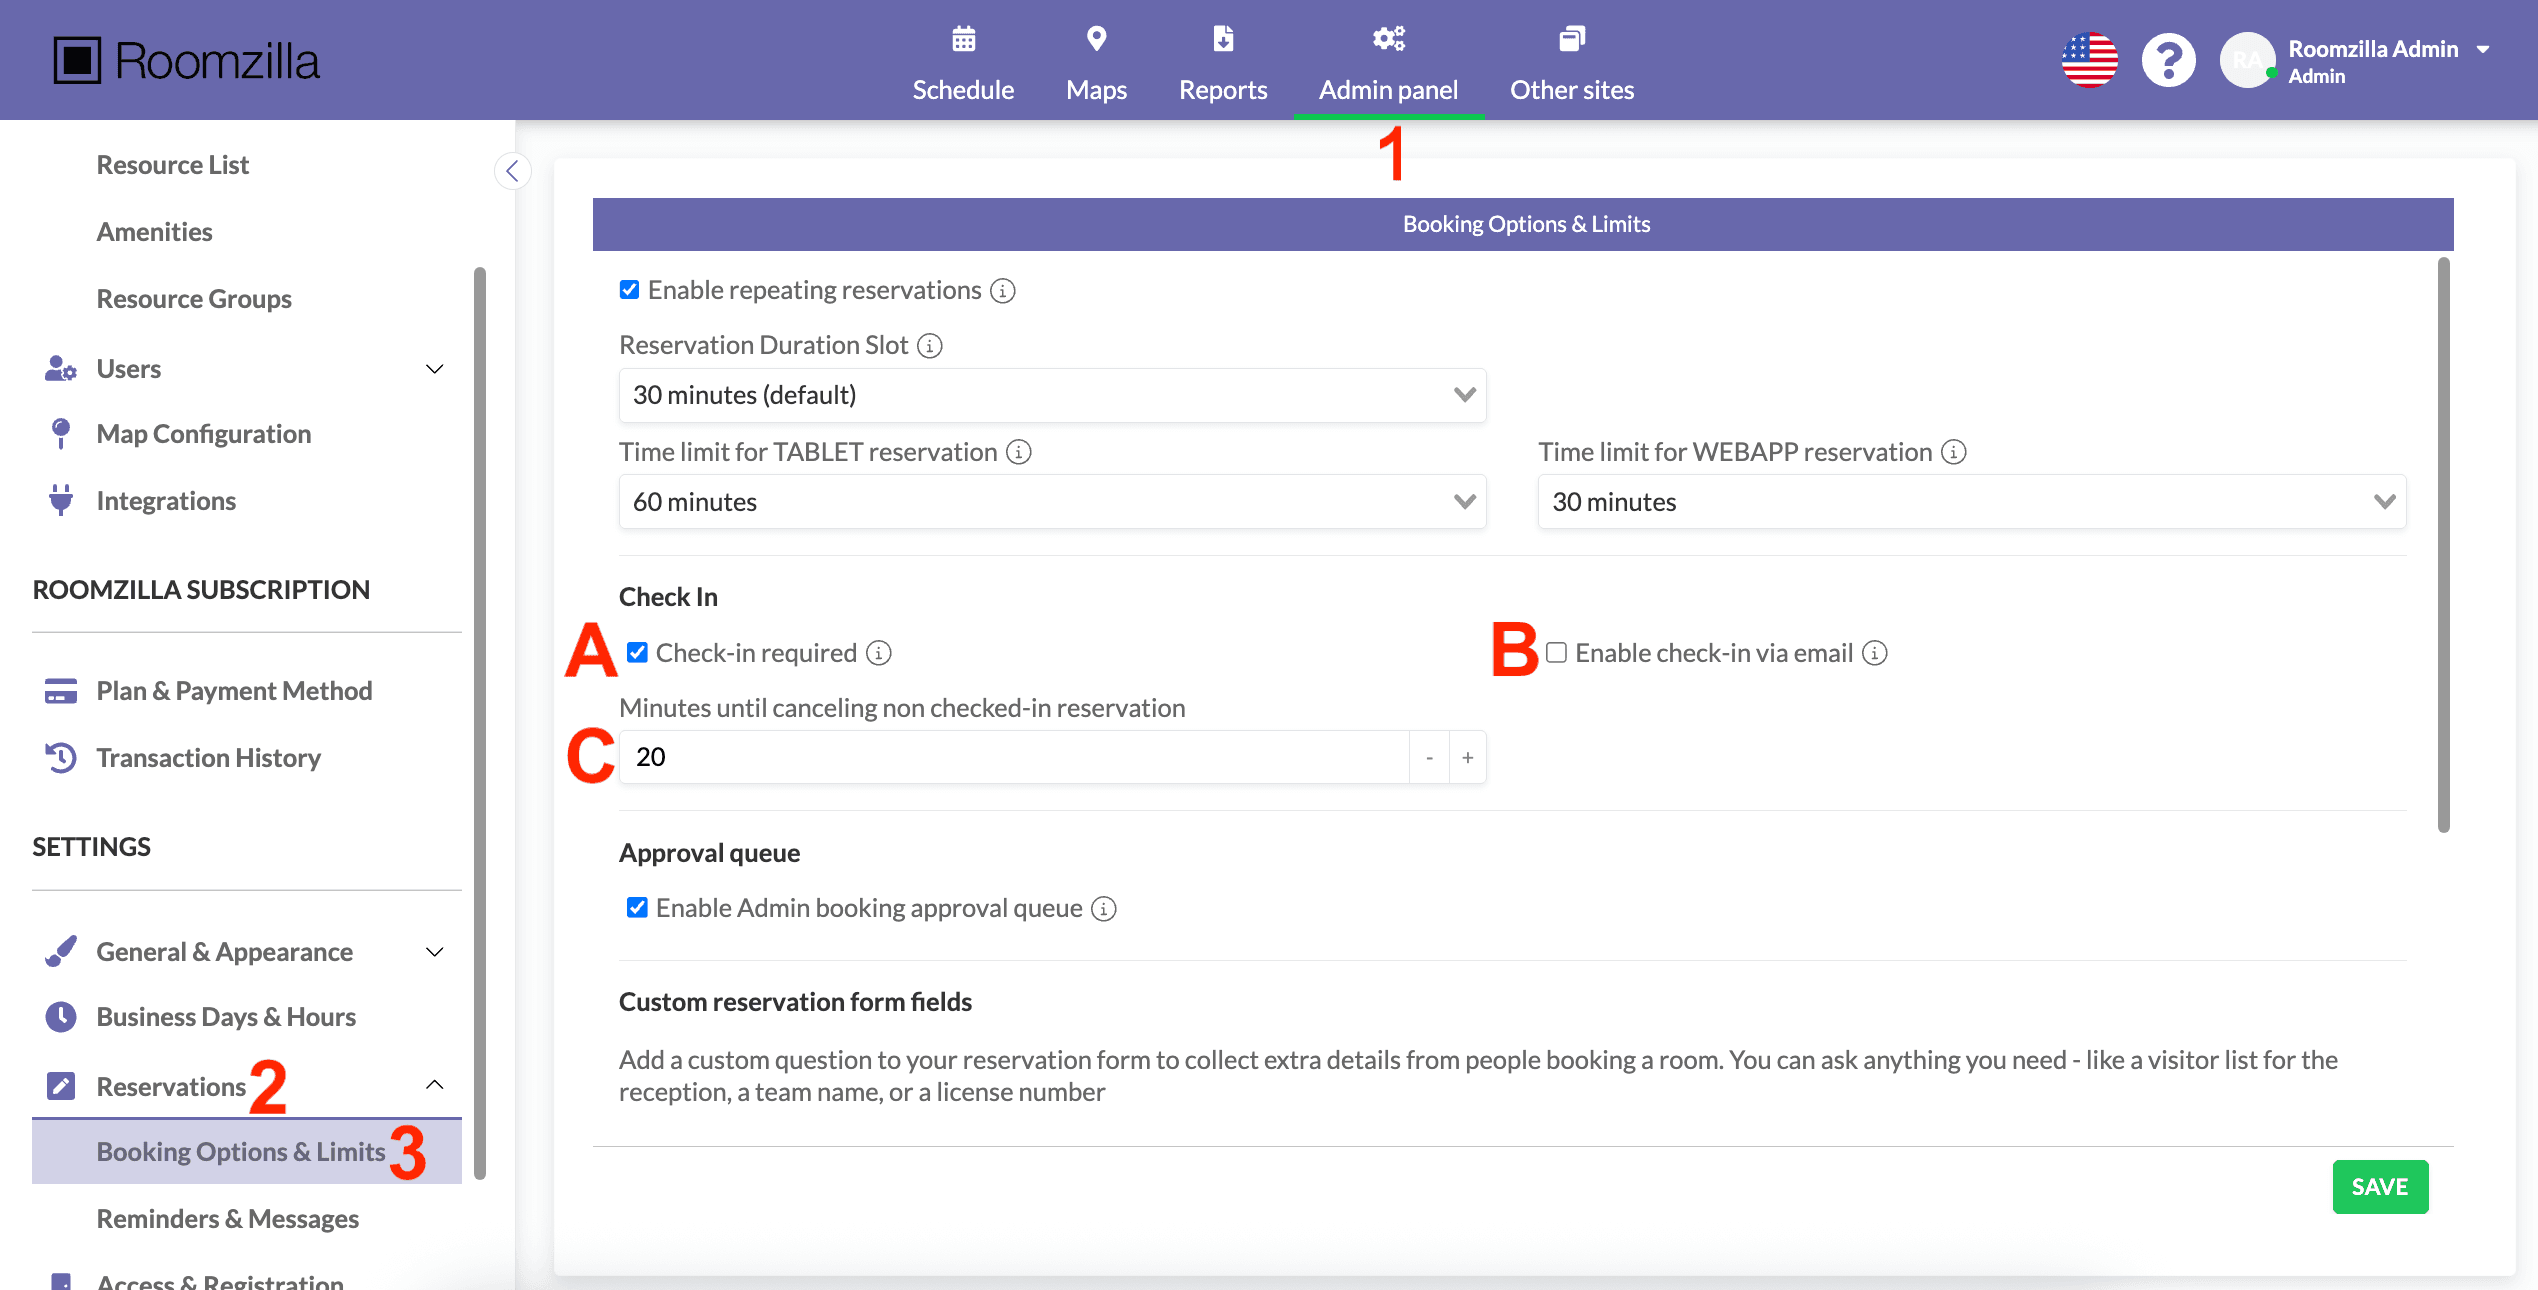
1. To enable the Check-in and Auto-Cancelation feature, go to: Admin panel [1] > scroll down to Reservations [2] > Booking Options & Limits [3]:
2. Check the “Check-in required” box [A].
This will require your Users to tap on the tablet/use the QR to ‘Check in’ their reservation.
Additionally, you can authorize the check-in via e-mail [B], which will be possible via the link included in the email reminder sent 5 minutes before the reservation starts.
3. You can now decide how long to give Users before a meeting is automatically terminated [C].
Note that if [sound notifications] are enabled, this value must be greater than “Check-in (min after start)”.
4. Hit “Save”.
Step 2: Manage check-in option
Mandatory check-in can be turned off for selected Resources:
1. In Admin panel [1], go to Resource List [4] section, select the Resource you want to have updated [5], and hit “Edit” [6]:

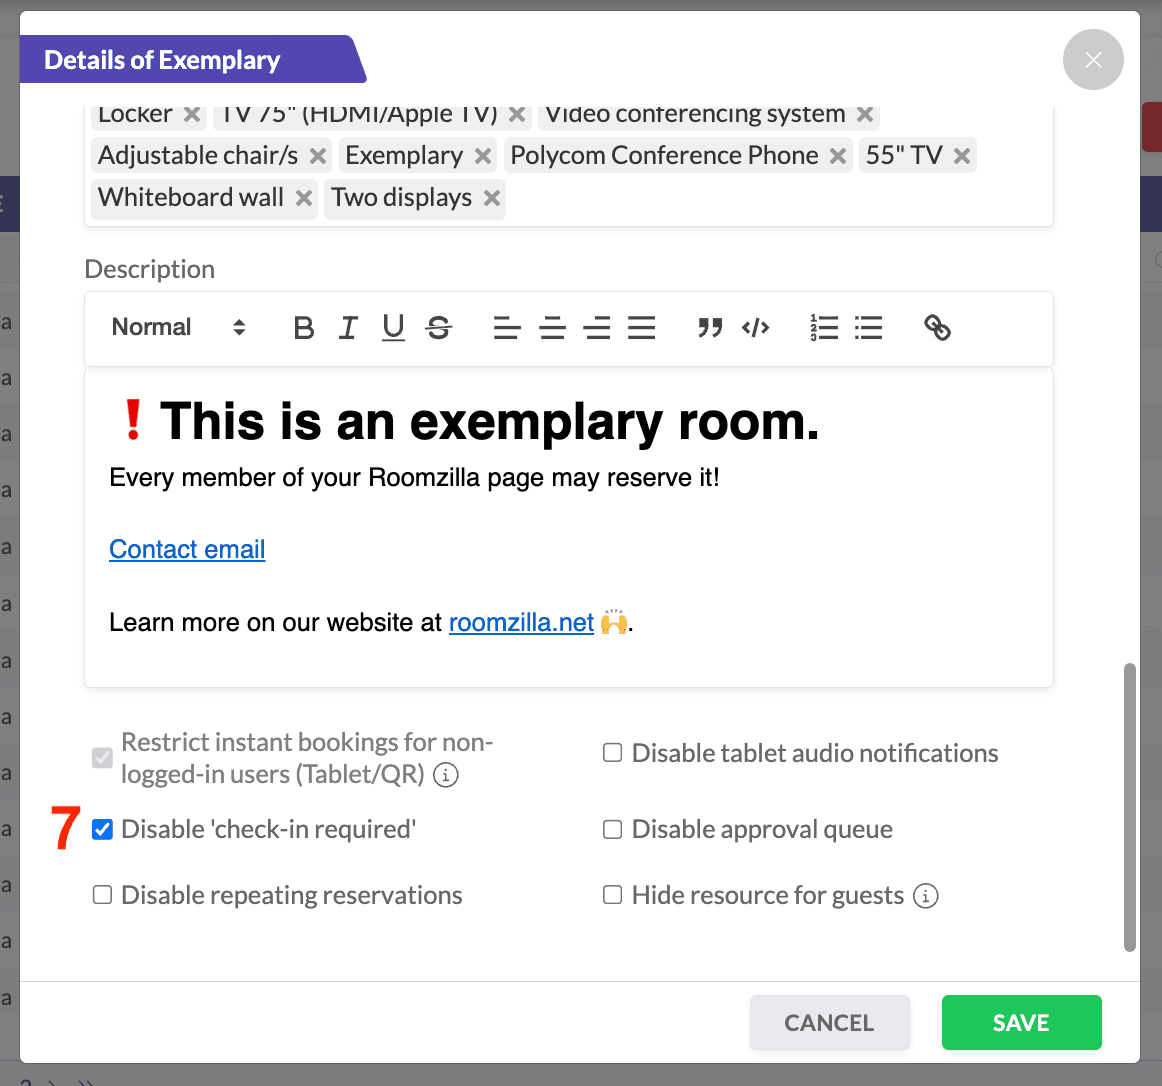
2. In the details window that appears, scroll down to check the “Disable check-in required” box [7] and hit “Save”:
The following aspects are worth noting:
- Admins can check-in reservations in advance. Check out our article on that: [Reservation Pre-Check-In]
- Any auto-canceled reservations will be flagged in the [Raw Data report]. Their duration will match the “Minutes until canceling a non checked-in reservation” parameter value that was set at the time of the reservation.
- Additionally, these bookings are included in the [Heavy Users report]. This feature helps you identify individuals who frequently miss their reservations and block rooms, allowing you to address this behavior.