Schedule tab explained
Scheduling tab explained
Learn here how to navigate our Scheduling tab as well as shortcuts to find the right resources at the right time.
1. Daily view
The classic Roomzilla view allows you to see all resource schedules for the day. Use the dropdown [1] to switch to the weekly view [2], which is explained later in the article.
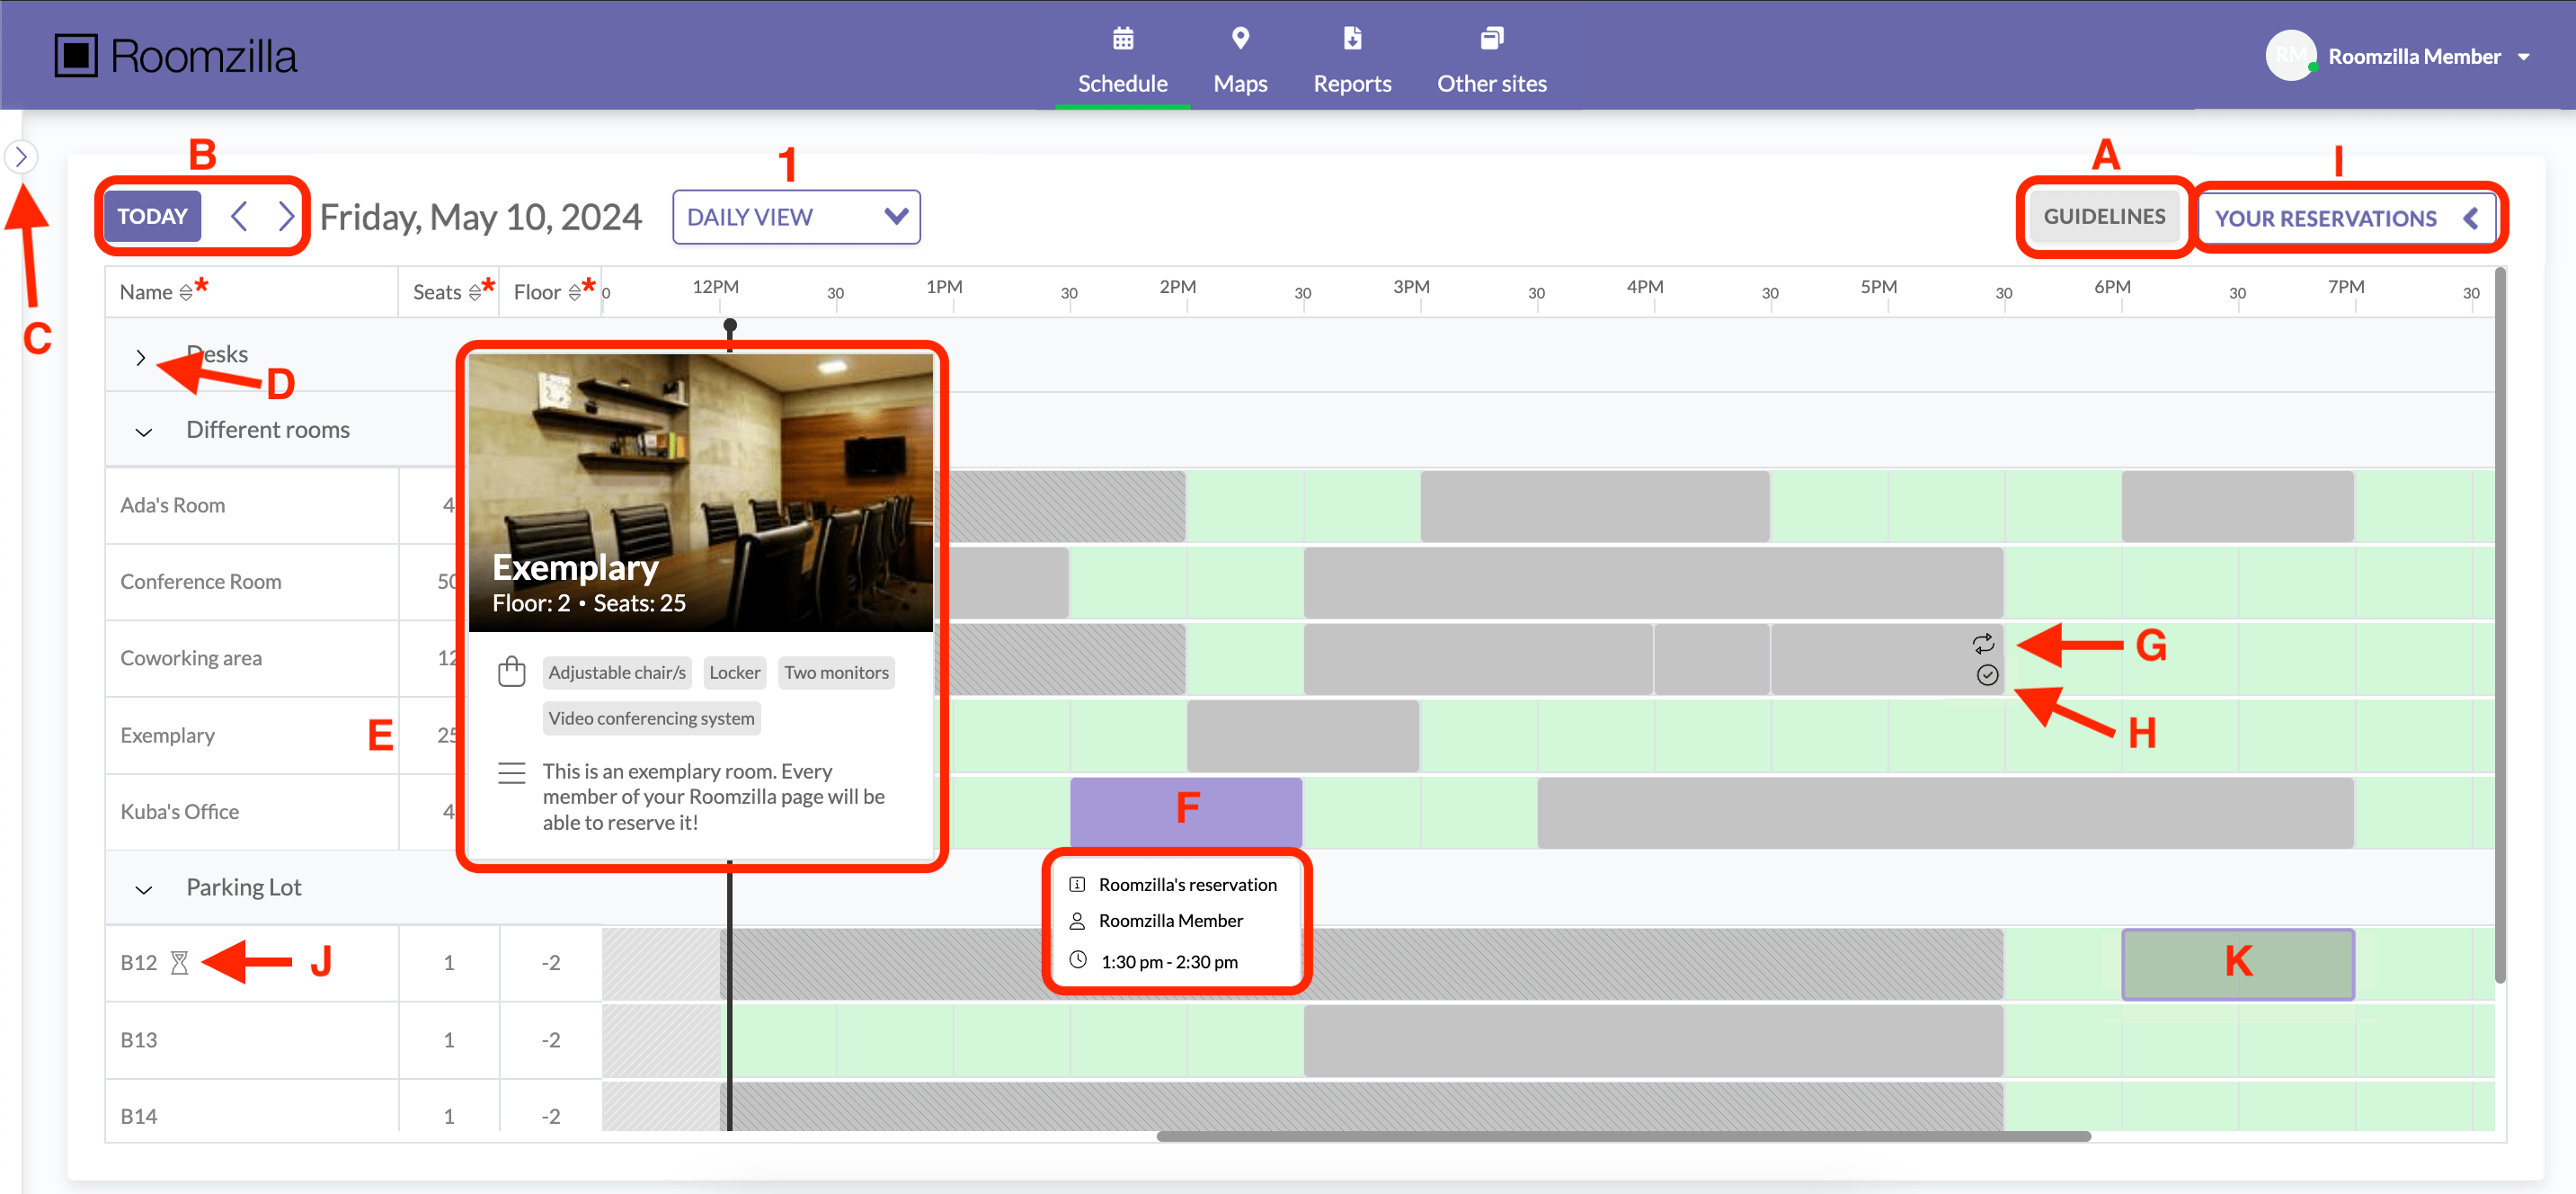
A – Guidelines – familiarize yourself with your organization’s rules and check for helpful contact information or useful links. If the admin has not provided this information, the “Guidelines” button will not be displayed.
B – Simplified date picker – review the schedule for coming days easily and get back to the present day quickly.
C – Filters expander – Hit the expand button to reveal the filtering tool
D – Group collapse – with one click, hide all Resources within the Group you are not interested in booking to have a clearer view
E – Resource details – hover the mouse over a resource name to see its details, such as location, maximum capacity, amenities available, description, and photo/picture. If the description is cut off, click on the field containing the resource name to open a modal with the full description.
F – Reservation details – hover the mouse over a reservation’s tile on the timeline to see its details
G – Repeating reservation – the two-arrow mark indicates that the reservation is an occurrence of a series
H – Checked-in reservation – if the reservation has been checked in, an icon will be displayed in the bottom right corner of the reservation’s tile
I – Your Reservations list displays ongoing and upcoming bookings; the list can be expanded or collapsed for better timeline visibility; you can manage bookings directly from the list (edit/remove, add event to a personal calendar)
J – the sandglass icon indicates that you can request a booking for this resource, but it requires admin approval before it is added to the timeline; this will only be visible if the “Approval Queue” feature is enabled in your organization
K – if the reservation tile is transparent, it indicates that it’s a booking request awaiting admin approval; this will only be visible if the “Approval Queue” feature is enabled in your organization
* – the order in which Resources are displayed can be sorted within the Group by name, capacity, and floor
Search and Filters
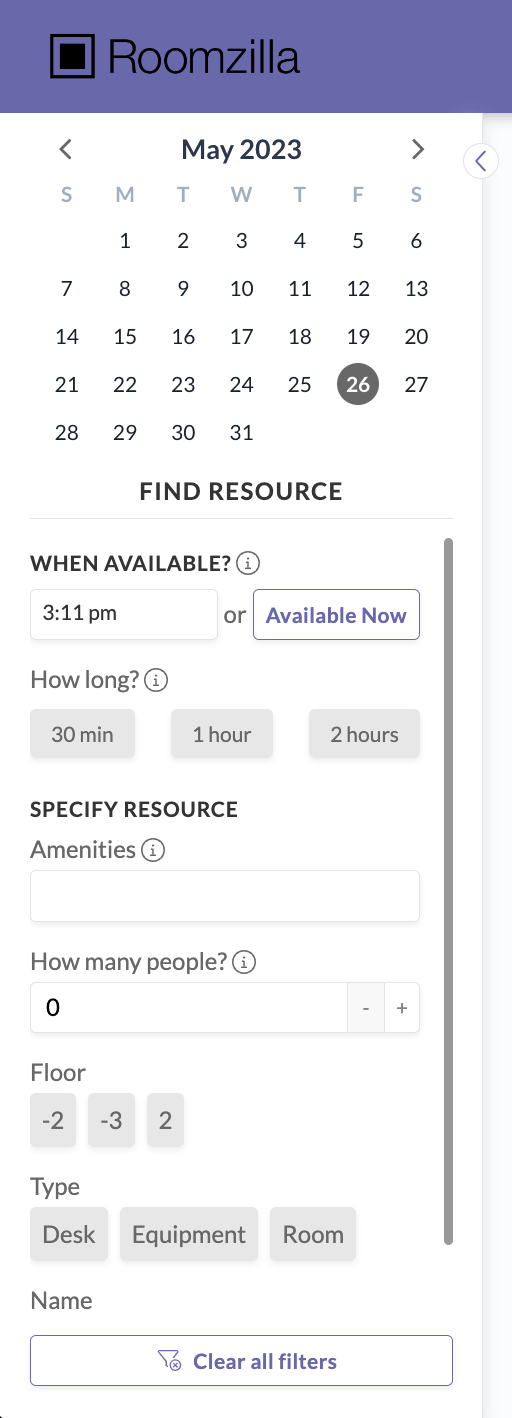
Use our “Filters” feature to promptly find what you are looking for – a perfect room for your meeting!
Roomzilla has some fantastic filtering tools available for our users that allow you to filter out any resources that do not match one of your criteria.
Date – Use the calendar to search for resources available on the selected date.
Start Time – Find which resources will be available at your desired start time, or view currently available resources with just one click.
Duration – Once you select a start time, decide how long you want your reservation to last.
Amenities – Search here to find and filter out any resources that do not contain the amenity you are looking for.
Capacity – Filter out Resources that will not be large enough for the number of people you have attending.
Floor – Looking to find a resource on your floor? Simply select which floor you are looking to reserve to see what options are available.
Resource Type – Use this to filter down to a specific resource type, e.g. room, desk, or equipment.
As you can see, with the available filtering tools finding the right resource is quick and easy. You can use these filters together or individually if required.
Once you’ve found a suited resource, your reservation is just two clicks away. See our article on creating reservations.
Remember to clear all filters afterward, to see all resources’ schedules for the day again.
2. Weekly view
Our weekly view [2] provides a broader perspective of a single resource [O] schedule, showing all reservations for the week.
Simply select the day you want to book [P] and create your reservations from here [R].
Use the arrows next to the month’s name [S] to review the weekly schedule for other weeks.
