Adding and managing Users – Members and Admins
Adding, editing, removing and approving Users - Members or Admins
This guide will teach you how to manage users of your Roomzilla page, as well as the different permissions they will have compared to an admin.
Received a membership request? This article will guide you on how to manage it.
For information on setting up member registration rules, please refer to our article on [Registration preferences Settings].
For information on setting up Guest access and reservations, head to the following article: [Read-Only Mode and Guest Reservations].
Understanding User Access Levels
Roomzilla provides different access levels to help you manage your space. Each level grants specific permissions to users on your account.
Member [A]—can use Roomzilla for all their booking needs. They can view the schedule, create and edit their own reservations, and access their reservation history in reports. Members do not have access to the Admin panel tab.
Admin [B]—has full access to your entire Roomzilla page and all its settings. They can perform any administrative task, including managing users, configuring resources, editing all reservations, and accessing all reports.
Guest—is a user who can view your schedule and make reservations without signing up for a Roomzilla account. Guest access is only available if you have enabled the guest booking feature. Guests are not visible in your user list and must have the correct public URL to access your page.
User Status Explained
Invited [4] – The user has a pending invitation that remains valid for 14 days from the date of sending. After this period, the invitation will expire, and the user will no longer appear on the list. To gain access, the admin must send another invitation, or the user must request a membership using the login page link.
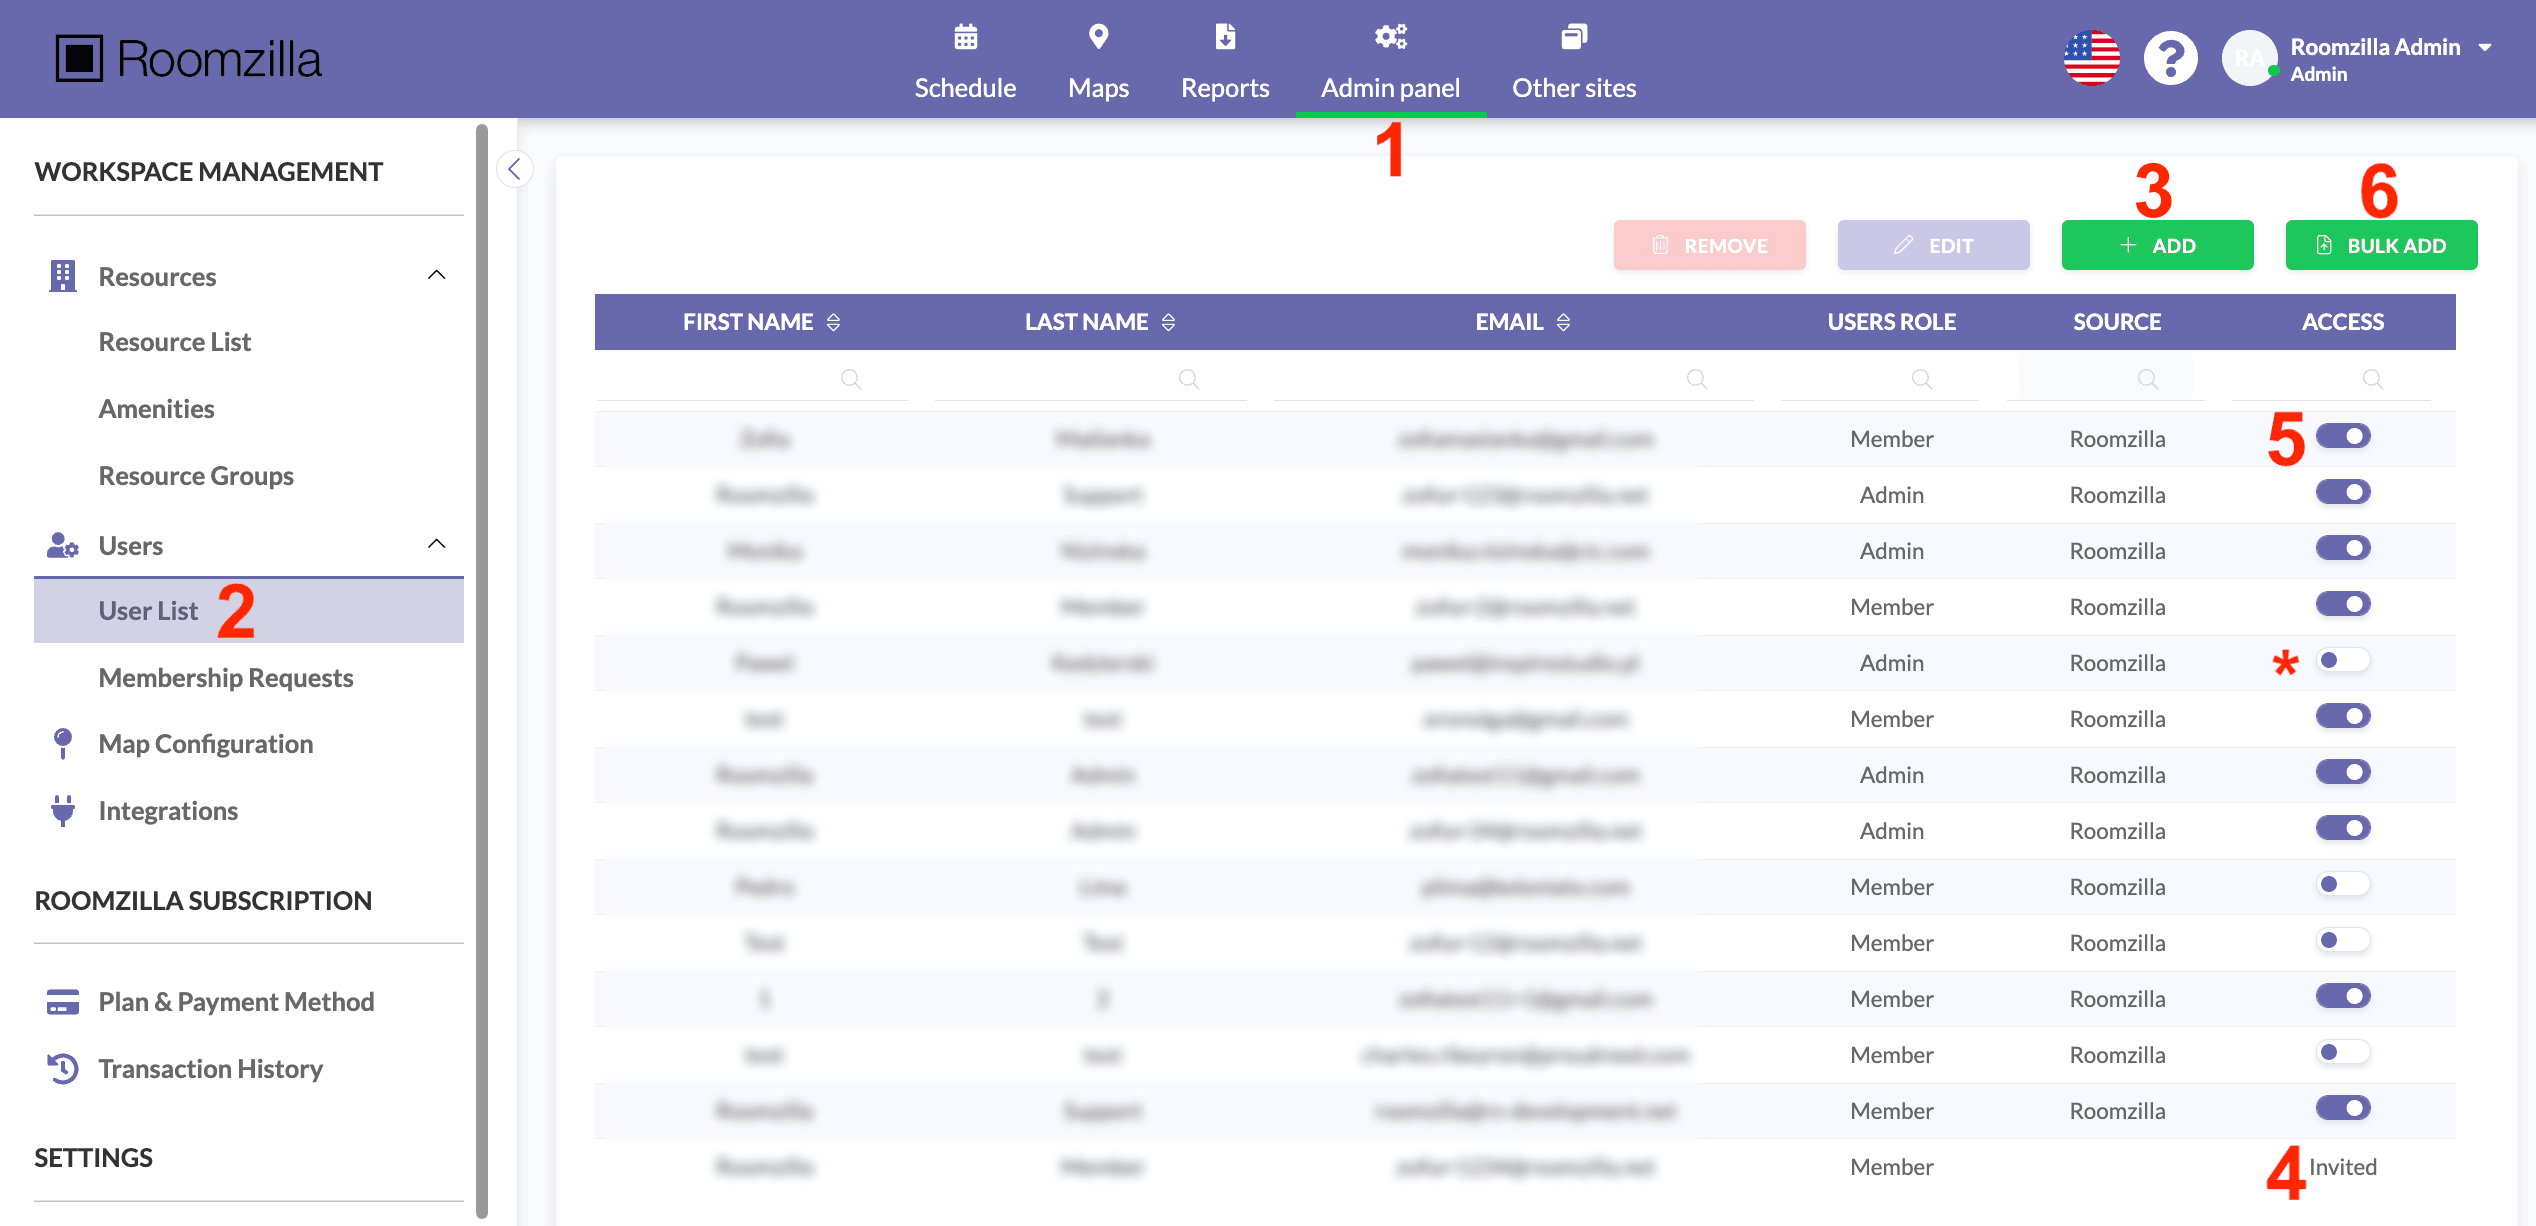
Active User [5] – Confirmed user. When the toggle is on, the user’s account is active, and they can log in. If the toggle is switched off [*], their access is immediately disabled, and they cannot log in. All of their account data, however, remains in the system.
Adding New Users
1. Log in to your admin account and go to: Admin panel [1] > User List [2]
2. Here you can add a new user [3]
2. Fill out the form, which, upon completion, will send an invitation out directly to your new User’s inbox:

3. Upon activation via the received email link, they will gain access to your Roomzilla page.
Bulk Upload of Users
See our article on [User Bulk Upload] to learn how the “Bulk Add” feature [6] works.
Editing Registered Users
To edit any user’s details or access level in your organization, head to the User List section [2], then select the given User row [7] and hit Edit [8]. You will see a similar form to that before. Name, Last Name, and role can be updated. Once filled out, hit “Save” to confirm changes.

Note: For pages integrated with Google or Microsoft (Source: Google or Microsoft [**]), a synced user’s details (such as their name or email) must be edited in the external account. Within Roomzilla, you can only change the user’s role. All other changes made in the integrated account will sync to Roomzilla within 10 minutes. For more details, please refer to the following article: [Google Workspace integration setup].
Deleting Users
To completely remove access to your page for a particular User, head to the User List section [2], then select the given User’s row [7] and hit Remove [9].
You will be prompted to decide on removing this User’s account only or the account along with their future reservations:

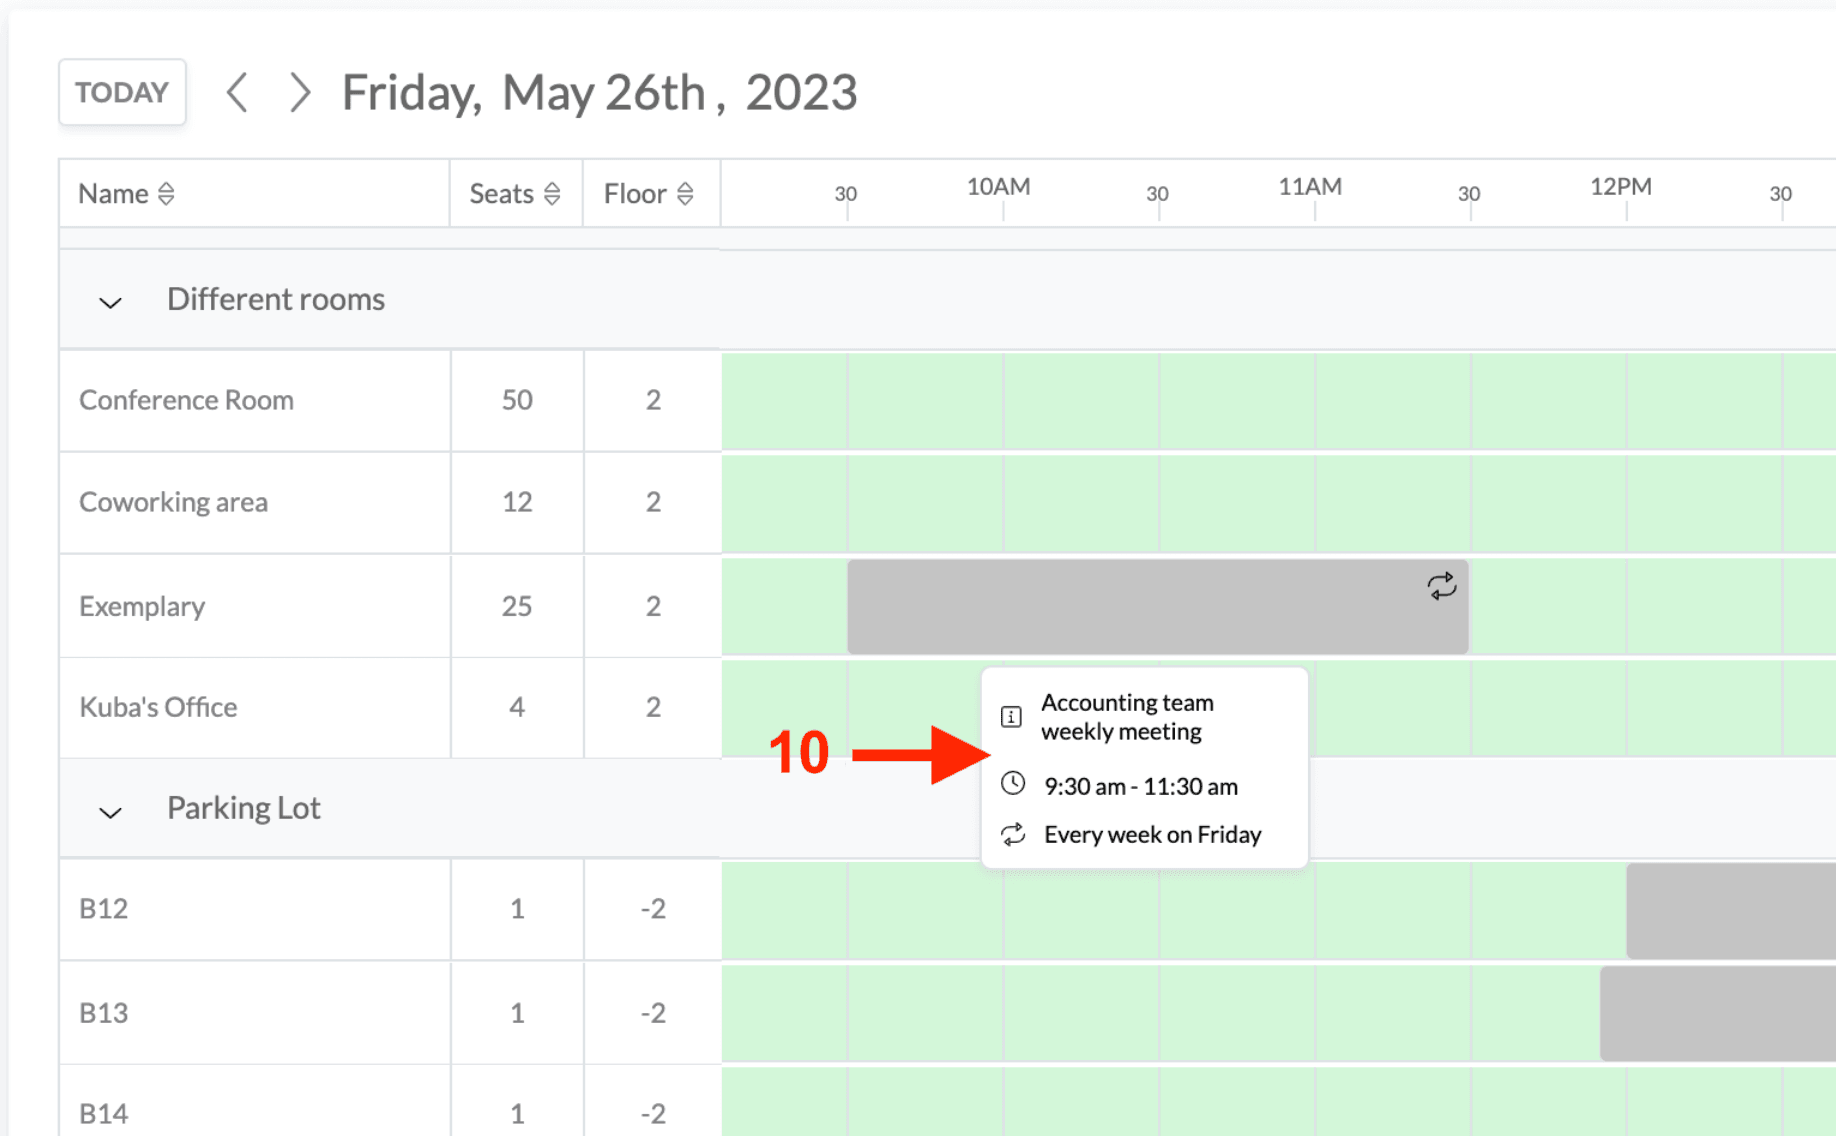
If you leave future reservations made by this User in the system, they will remain on the Schedule’s timeline without any host assigned [10].
Approving Membership Requests
When your login page has a public sign-up form and requires admin approval for new members, you will receive an email notification each time a new user requests access to your page.
After you receive a notification, follow these steps to manage the request:
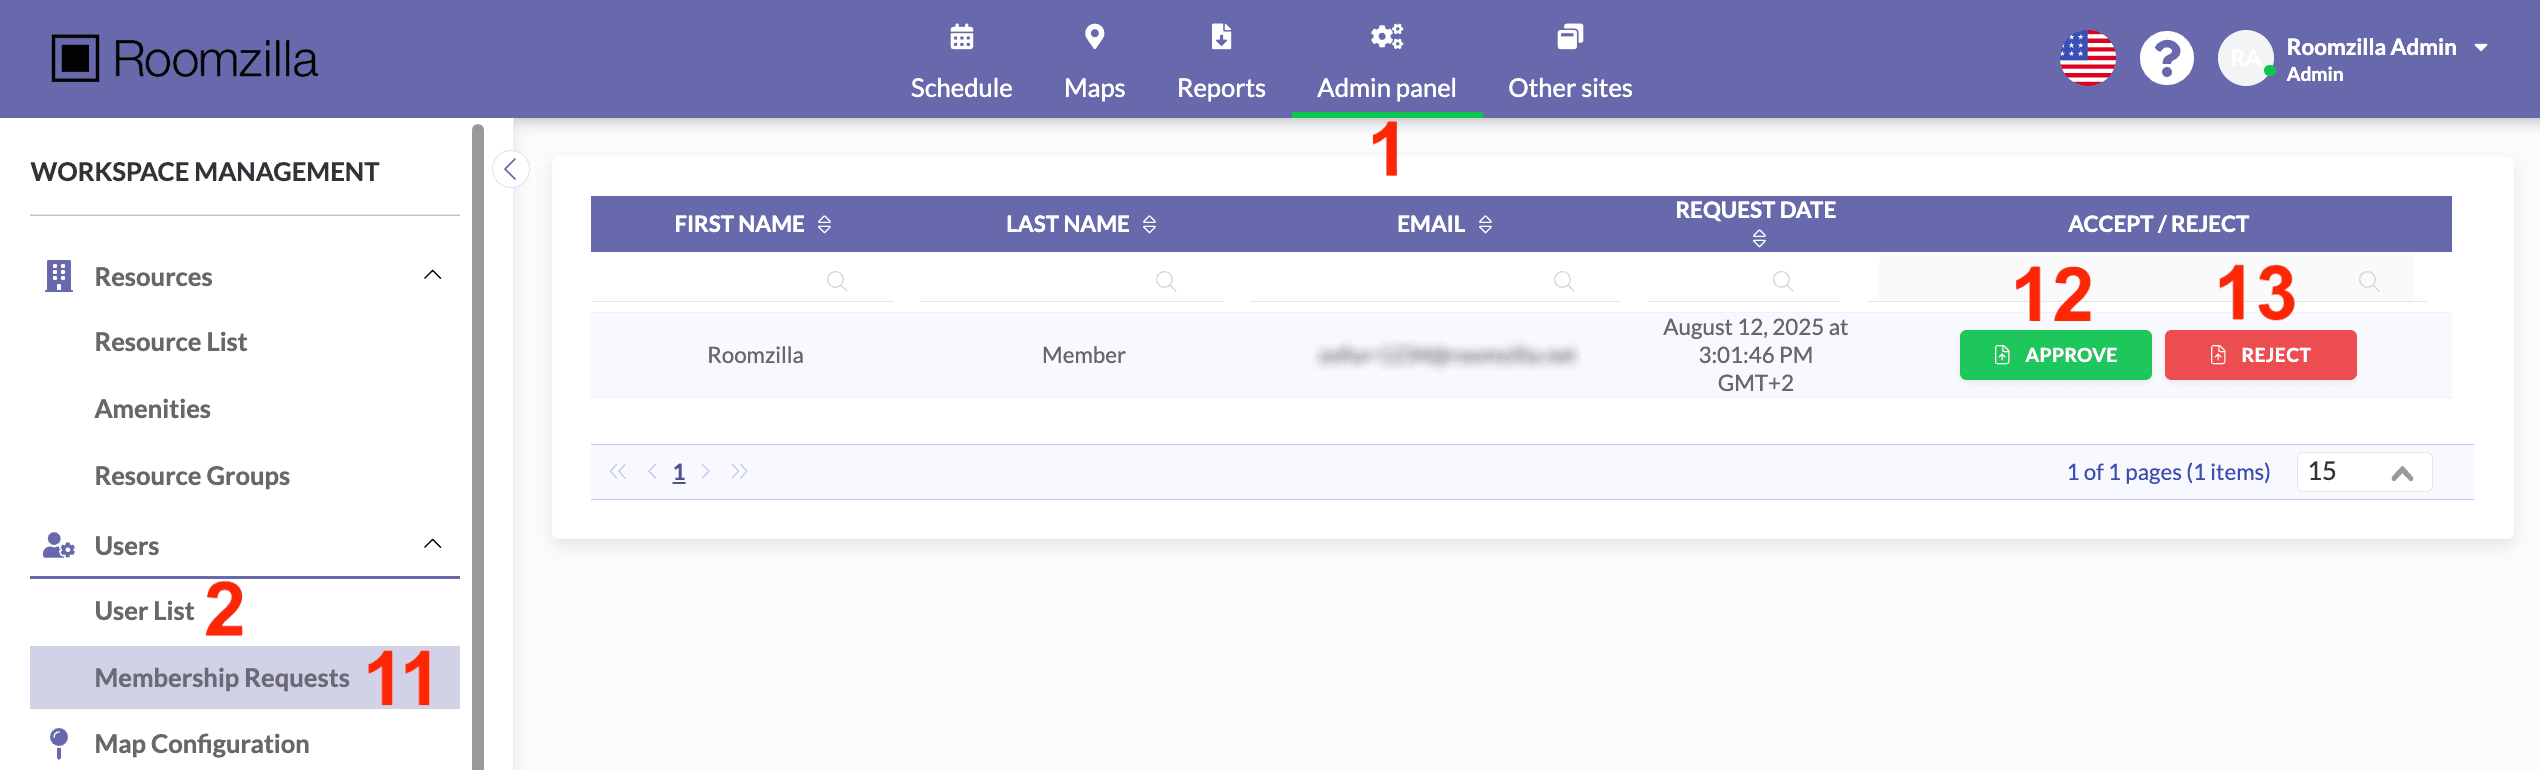
1. Log in to your Admin account and head to: Admin panel [1] > Membership Requests [11].
2. Next to each person who has requested access, you’ll find two options:
- Approve [12] Grants access to your page. Upon approval, the new member will receive a confirmation email and gain access after setting up a password. New member’s details will then be displayed in the User List section [2].
- Reject [13] Declines the request and deletes the user’s record. The requester will receive an email notification with your decision.
Note: Membership requests remain pending approval for 14 days. If they are not reviewed by an admin within this timeframe, they will be automatically removed, and the requester will need to submit a new request.