Reservation Approval Queue
Approval Queue
Roomzilla’S Approval Queue feature allows you to take full control over your resources’ schedules. No reservations will be added to the timeline without an admin’s approval.
Step 1: Activate Approval Queue
1. Begin by navigating to: Admin panel [1] > Settings: Reservations [2] > Booking Options & Limits [3] section.
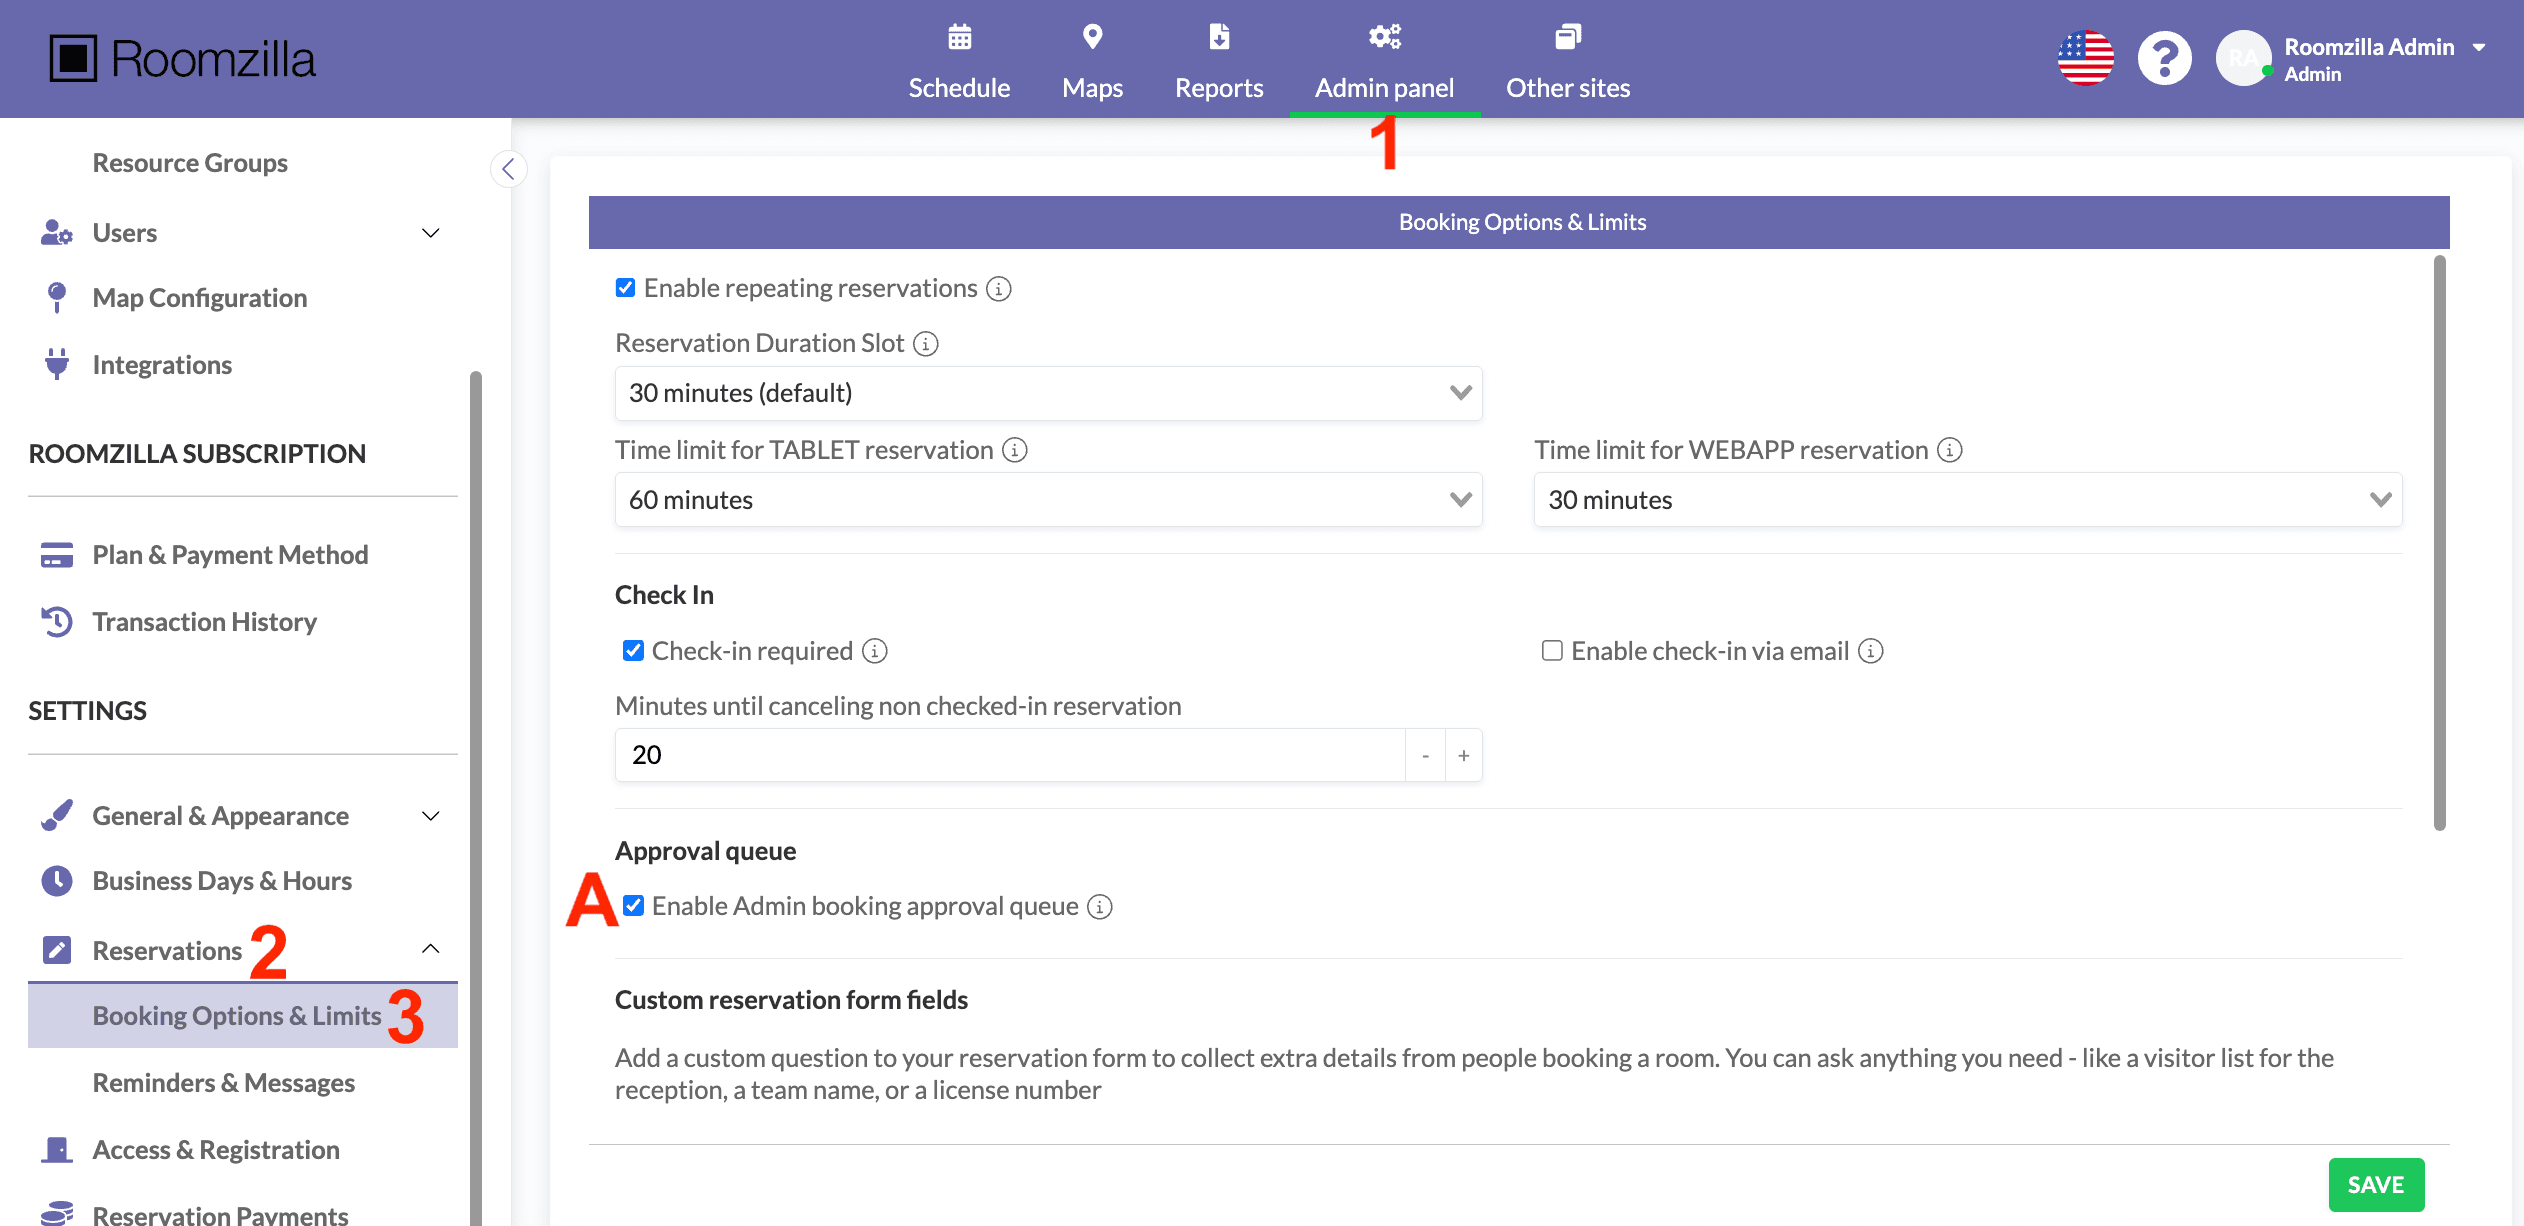
2. Check the “Enable Admin booking approval queue” box [A].

3. After clicking “Save”, you will be prompted to decide whether to:
[B] – Do not assign any resources to the approval queue initially. You can manually enable it for specific resources later through the Resource List tab [4].
[C] – Assign all existing resources to the approval queue immediately. You can manually disable it for specific resources later. Any reservations already on your timeline will remain and be marked as ‘approved’. However, all new bookings will now require admin approval.
4. Done!
Step 2: Manage the approval queue option
Once the Approval Queue is enabled for your organization, you can turn it off or on for individual Resources.
1. Head to the Resource List tab [4] in your Admin panel [1], select the Resource you want to have updated [5], and hit “Edit” [6]:

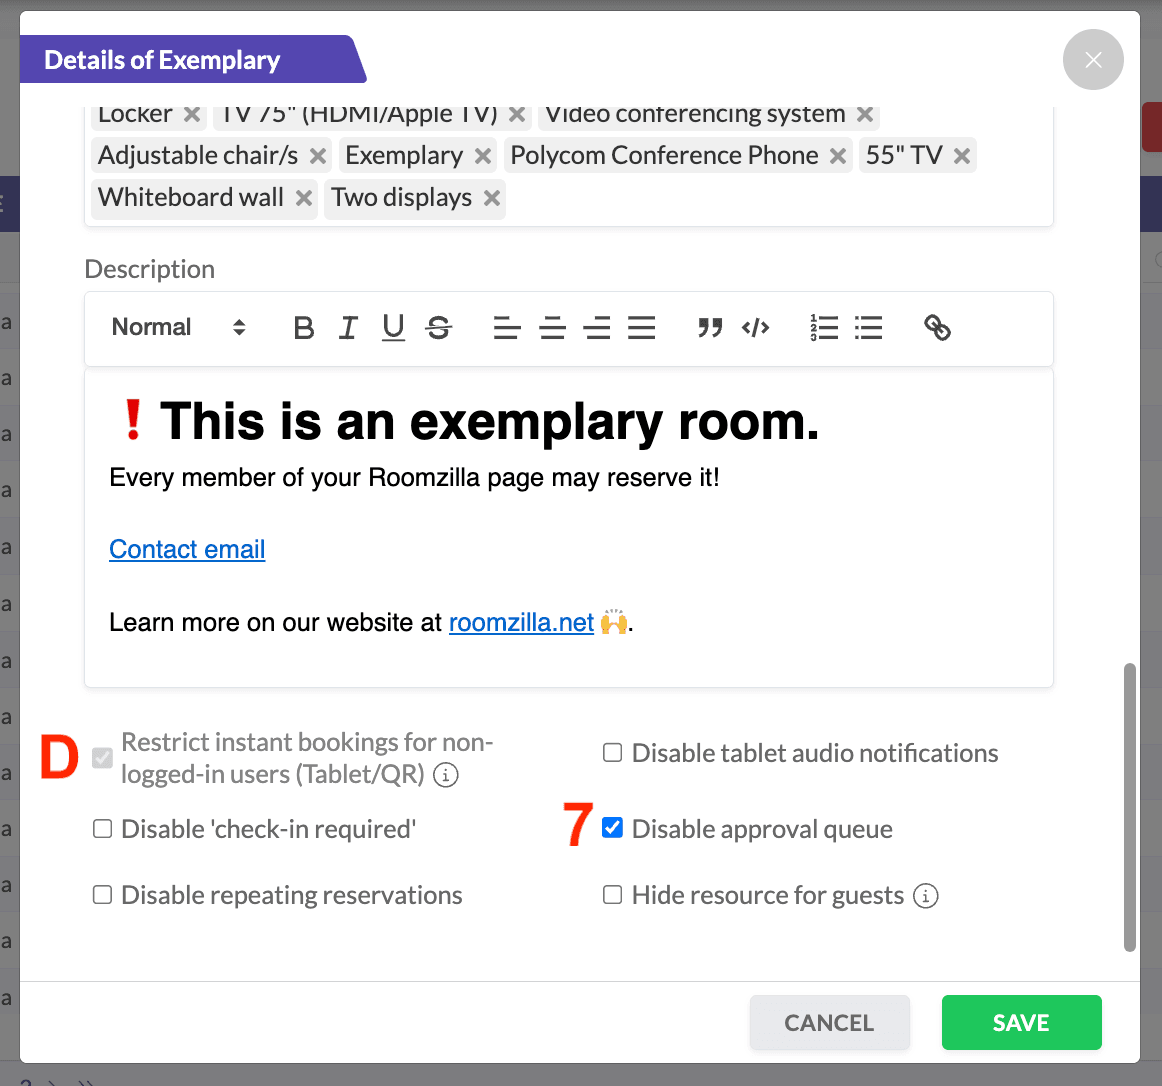
2. In the details window that appears, find the “Disable check-in required” box [7] and choose one of the following options:
- Check the box if you do not require admin approval for reservations created by users for this specific resource.
- Uncheck the box if you want your admin users to receive notifications of reservation requests for that resource and have the option to accept or reject them.
3. Click “Save” to confirm the changes.
The following aspects are worth noting:
- When the Approval Queue is active for a Resource, local reservations (made from a tablet display or QR code) are not available [D].
- The option to create a repeating reservation is unavailable when the Approval Queue is active for the resource (this doesn’t apply to admin users).
- After enabling the approval queue, reservations that were created before activation are marked as ‘approved’.
- Once the approval queue is disabled, all pending requests will be automatically approved.
Approval Queue explained
Now that you’ve set up your Approval Queue, you can head to the “Schedule” tab [8] to review the changes and manage reservation requests.
A handy sand glass icon [E] will appear next to the resource name (and the tablet’s “Upcoming” section) for any resources that have the Approval Queue enabled. This icon indicates that admin confirmation is required before a reservation is confirmed. Additionally, pending requests will appear as transparent tiles [F] on the schedule until they are approved by an admin.

One way to manage pending Reservations is through the “Pending for approval” panel [9] on the right side of the timeline.
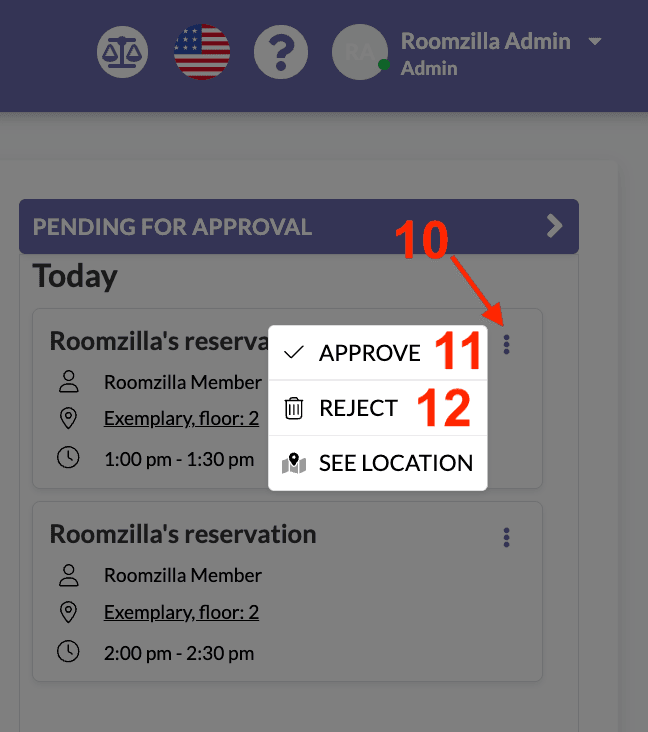 Click on the menu inside the reservation request tile [10] to reveal the possible options. Below, you can see what each of these options does:
[11] – APPROVE – This action approves the reservation, displaying it as a complete reservation on the timeline. Additionally, the host will receive an email notification about the approval.
[12] – REJECT – This action rejects the reservation. A window will appear where you can add a note, such as the reason for rejection. This note will be included in the email sent to the host, informing them about the rejection.
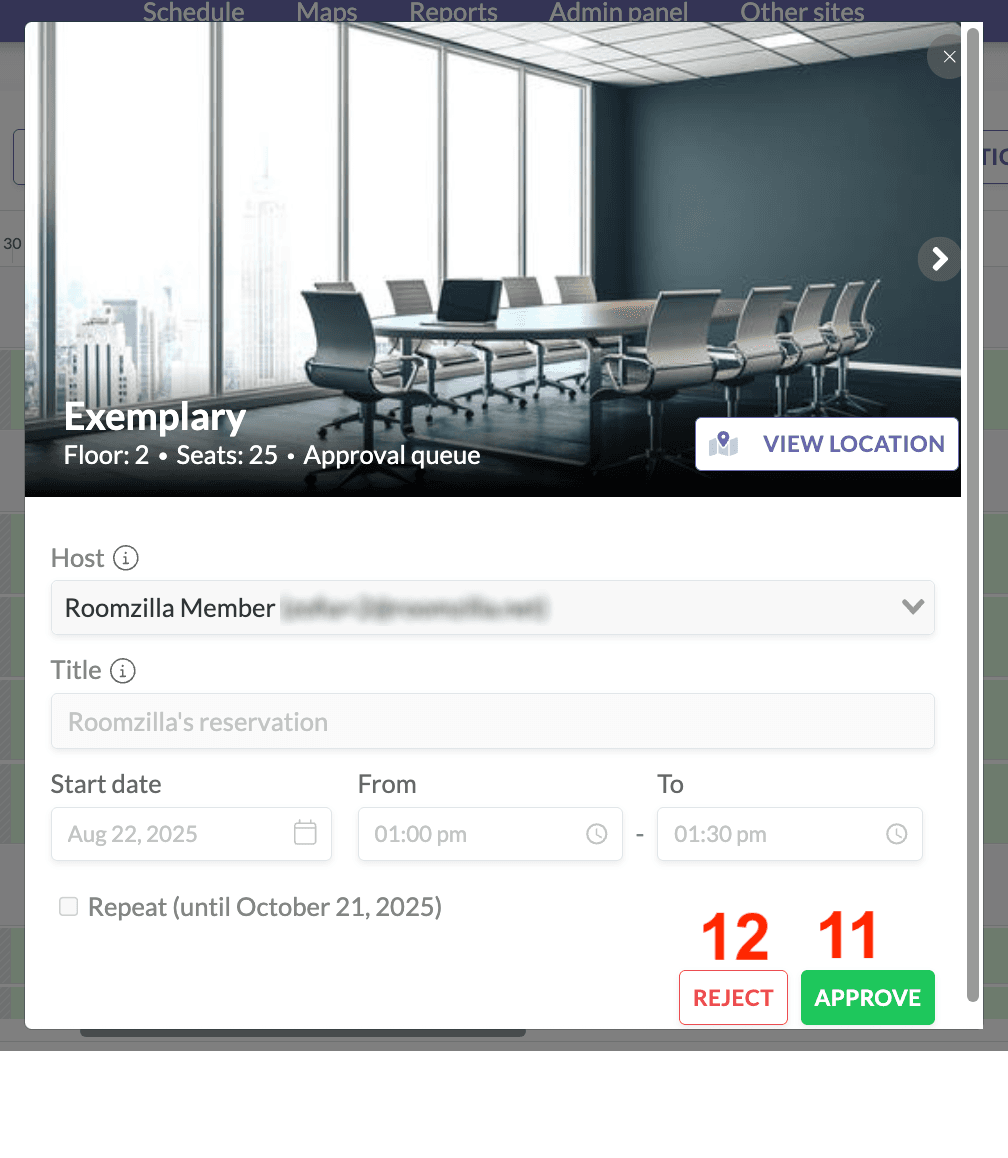
Alternatively, you can click on a reservation request tile [F] directly, which will open its details window with the same options to approve [11] or reject [12] the request.
The following aspects are worth noting:
- All admin users will receive email notifications each time someone requests a booking. They can unsubscribe from receiving these notifications through their [“Profile” section].
- Admin reservations are automatically ‘approved’ upon creation and will not appear in the “Pending for Approval” section.
- A request that hasn’t been accepted and has reached its start time will be automatically deleted, with a rejection email sent to the request host.
- Once an approved reservation has started, it cannot be edited; users can only choose to “End Now.” which will end the reservation immediately.