Reservation Pre Check-In
Pre checking-in a reservation
Learn here how to check-in a reservation in advance. If you need to block a room, e.g. for maintenance, use this option so that your reservation is not removed due to auto-cancel.
[Check-in] must be required by your organization for this option to appear.
1. To get things started, log in to your Admin account and head to the “Schedule” tab [1].
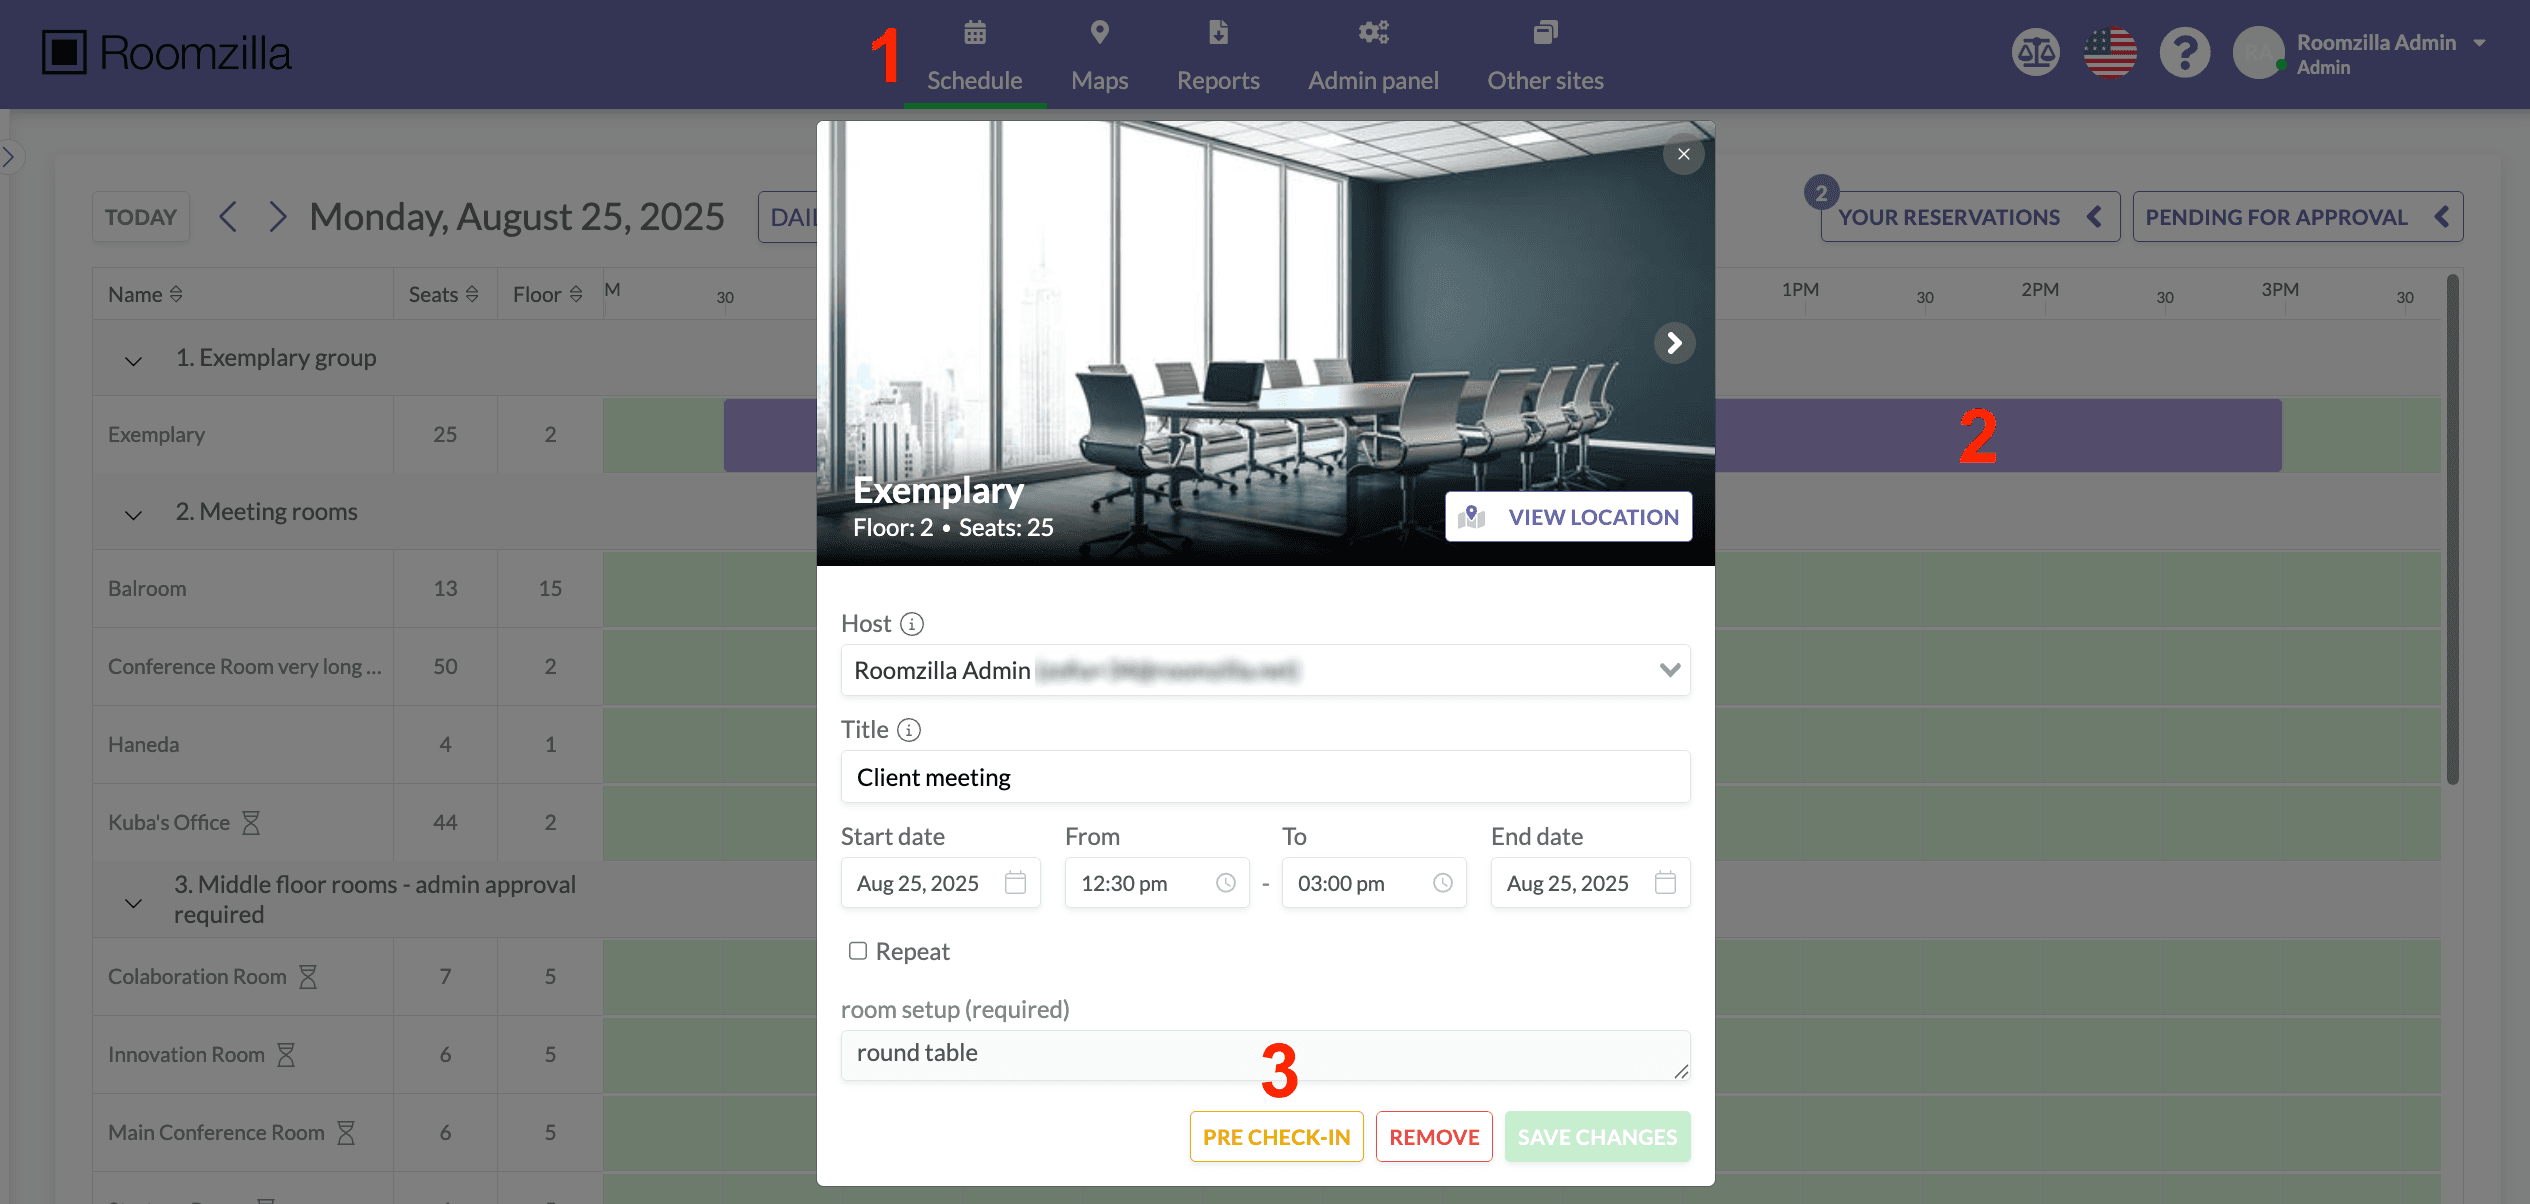
2. Select the reservation [2] you want to check-in in advance to open the edit form.
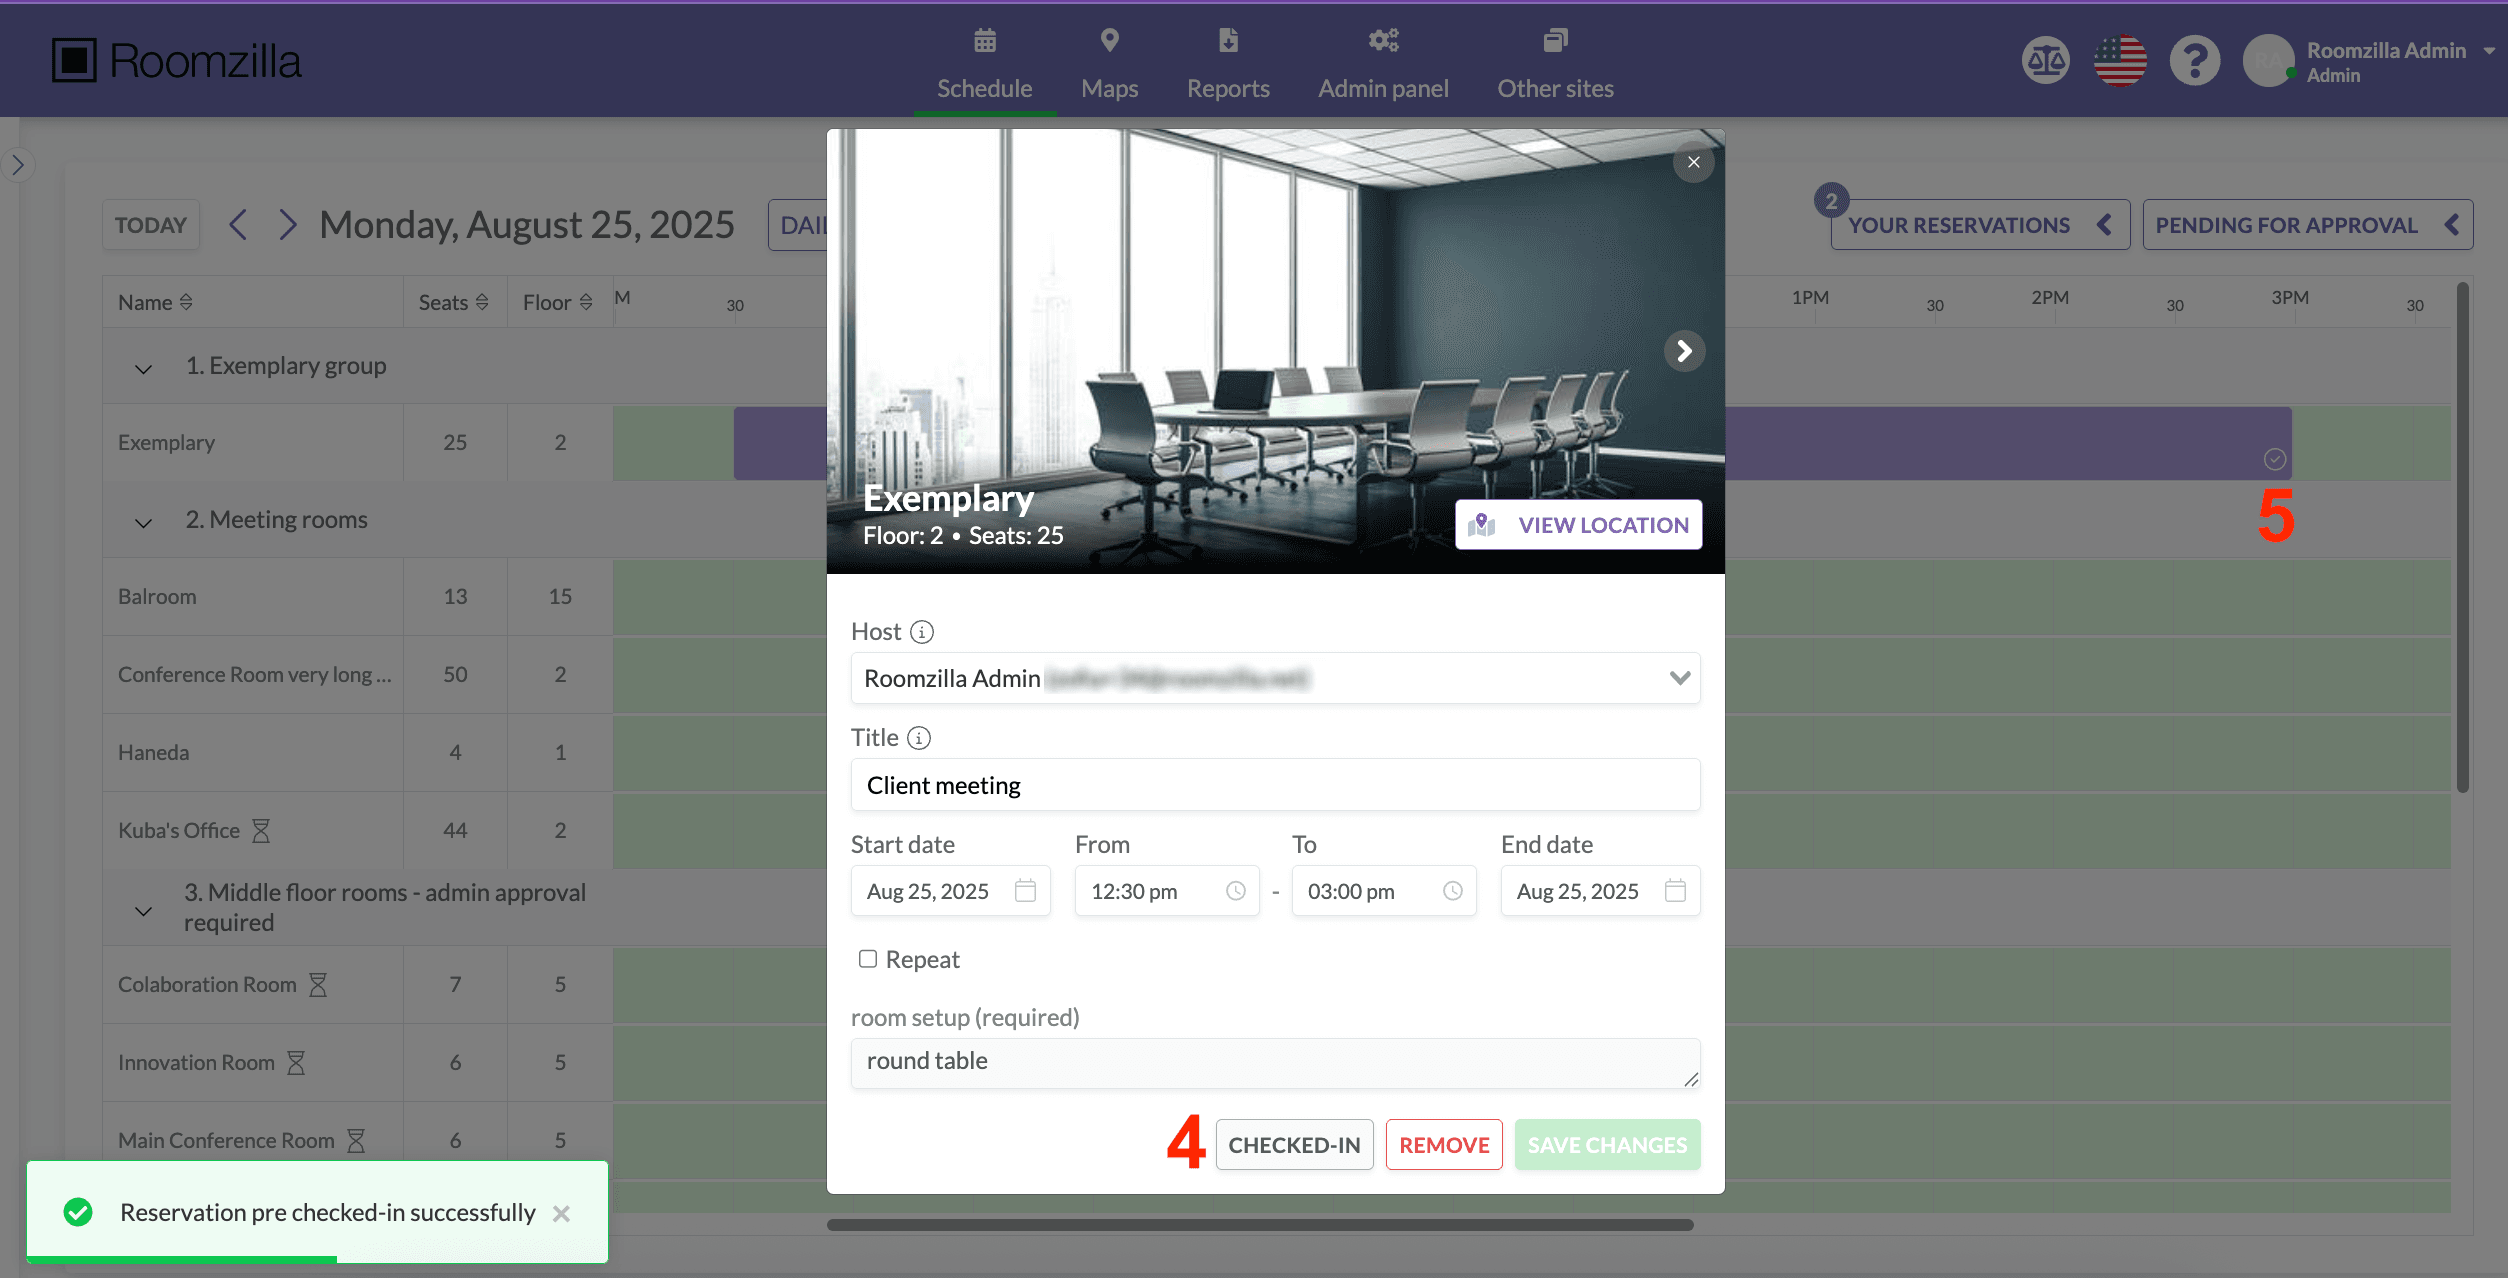
3. Hit the “Pre Check-In” button [3] and confirm.
4. Done! The reservation will be marked as “Checked-In” both in the reservation edit window [4], and the reservation tile on the timeline [5]. Additionally, reservation host will be notified about the change via email.
The following aspects are worth noting:
- The pre-check-in action is available only to users with an admin role, but an admin can perform this action on any reservation, including those made by members or guests.
- Only existing reservations can be checked-in in advance. This option is shown on the edit form, not when the booking is initially created.
- For repeating reservations, pre check-in can only be made for one occurrence at a time.
- Pre check-in cannot be undone; however, the reservation can be edited.