Business Days & Hours Settings
Business Days and Hours Settings
Customize the time zone and availability settings of your page to ensure your Resources are bookable at the right times for your users
Setting Time Zone and Booking Window
As an admin, you can configure your organization’s time zone and control how far in advance members are allowed to make reservations. These settings help ensure that bookings align with your local business hours and scheduling policies.
How to update settings:
- Navigate to Admin Panel [1].
- Go to Business Days & Hours [2].
- Select the Time Zone & Booking Window [3] sub-tab.
Available options:
- Organization time zone [4]
Choose the time zone that matches your organization’s location. This ensures all reservations, notifications, and schedules display in the correct local time. The default time zone is automatically set during onboarding based on your device’s time zone. Note: Reservations on the timeline will always be displayed according to each user’s local device time zone. - Reservation at most [5]
Set the maximum amount of time in advance that members can make reservations. For example, you may allow bookings up to 30 days ahead. This gives you control over how far into the future your schedule can be filled. It’s set to 180 days by default, and dates falling outside the limit have the timeline greyed out and are, therefore, unavailable for users to book.

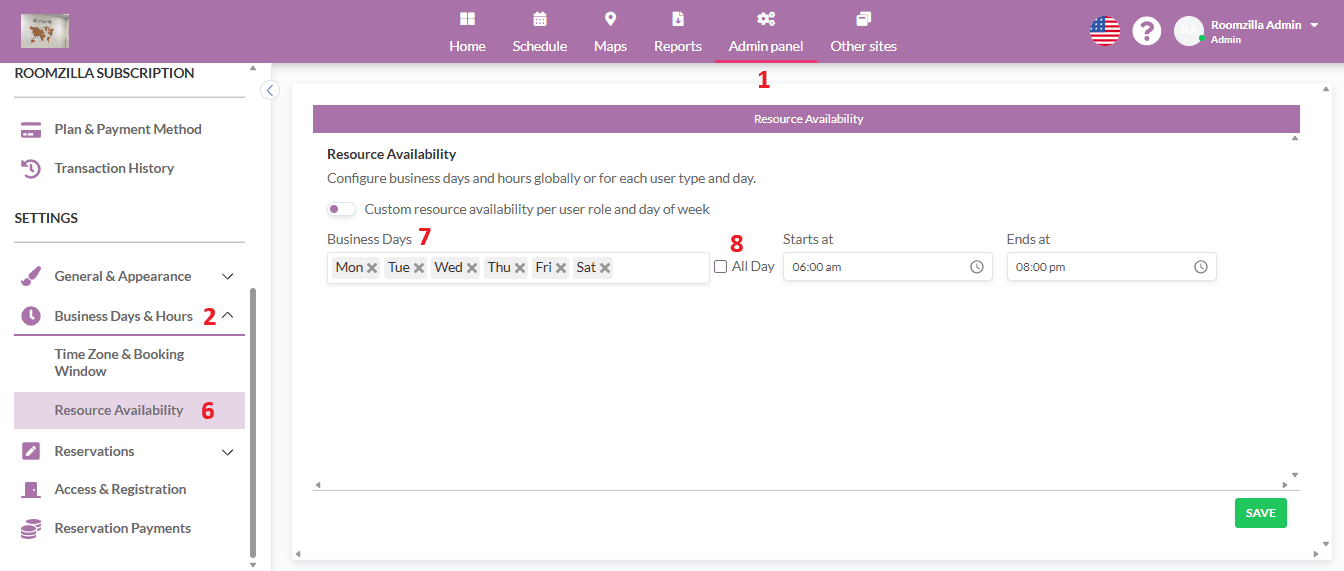
Configuring Resource Availability
Admins can define the business days and hours for their organization to control when resources are available for reservations. These settings can be applied globally or customized for each user type.
How to update settings:
- Navigate to Admin Panel [1].
- Go to Business Days & Hours [2].
- Select the Resource Availability [6] sub-tab.
Global Settings
In the global view you can configure the following options:
- Business Days [7]
Select which days of the week your organization operates by selecting options from the list. For example, you may choose Monday–Friday for a standard workweek. - Business Hours [8]
When All Day checkbox is checked, the business hours cover the entire day.
When unchecked, you can define specific start and end times for your business hours. This allows you to limit availability to certain parts of the day, such as 9:00 AM–5:00 PM.
Setting Custom Resource Availability by User Role
When the Custom resource availability per user role and day of week toggle is turned ON, the global business hours panel is hidden, and a new section appears where admins can define separate availability rules for each user type.
This feature allows admins to create different booking schedules for each user type — Admin, Member, and Guest (not logged in). Each rule defines when resources are available to that specific group.
Each rule includes the following settings:
- User Type – Select one of the available roles: Admin, Member, or Guest (not logged in).
- Days – Choose one or more weekdays (Mon–Sun) that the rule applies to.
- Business Hours –
- Check All Day if the resource should be available 24 hours.
- Or, specify From and To times to define business hours for the selected days.
- Delete Rule – Use the trash icon to remove a rule if it’s no longer needed.
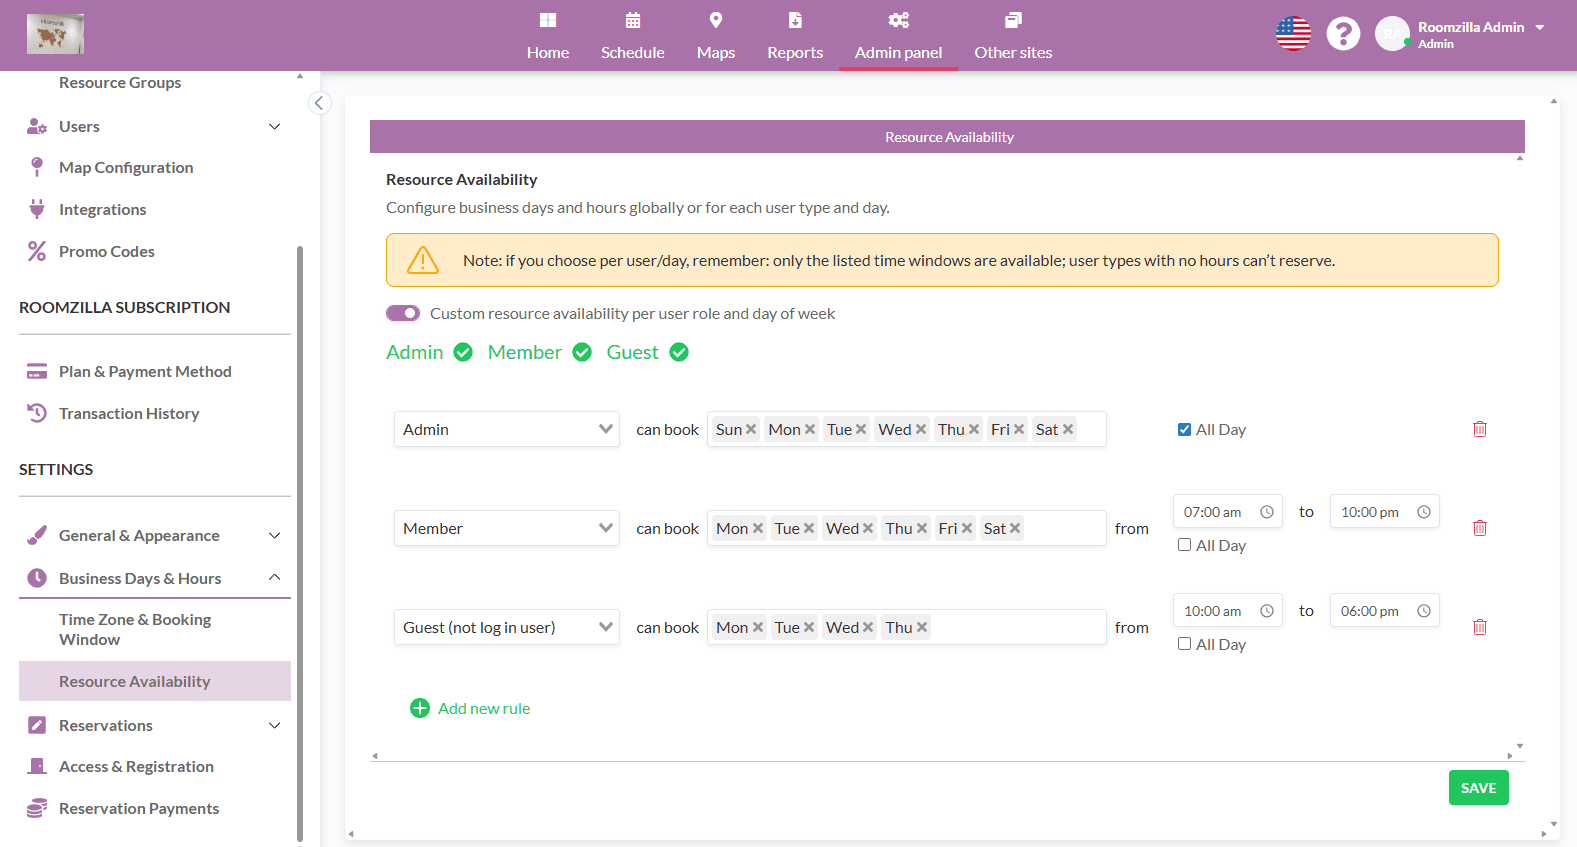
Rule Management Guidelines
- You must define at least one rule — the system will display a validation message if no rules exist.
- Each user type can only have one rule per day; duplicate entries for the same role and day are not allowed.
- Rules can be freely added, edited, or deleted at any time.
Important Note
When integration with Google Calendar or Microsoft Calendar is enabled, the option to set custom resource availability is not available. In that case, the system will rely on the global business hours settings instead.
Remember to click “Save” to confirm changes.