Resource Grouping
Resource Grouping
Resource grouping allows you to organize your Resources as you see fit. Keep rooms, desks, phone booths, floors, different districts of your space, or even physical locations separate for a clearer Roomzilla experience.
Create and manage your Resource Groups
1. Head to: Admin panel [1] > Resource Groups section [2].
2. Here, you can manage [3] your Groups:


- Add [3] – enter the name and description of your Resources Group, then hit Save. Please note that the description is only visible for Admin users viewing this section, but not on the Schedule.
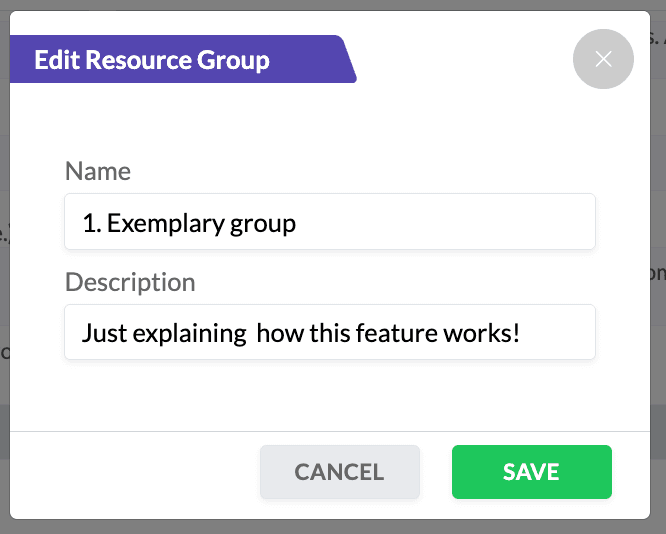
- Edit [3] – select [4] an existing Group to edit its name or description.
- Delete [3] – As you can imagine, this will delete the selected Group and unassign any Resources.
Add Resources to the Groups
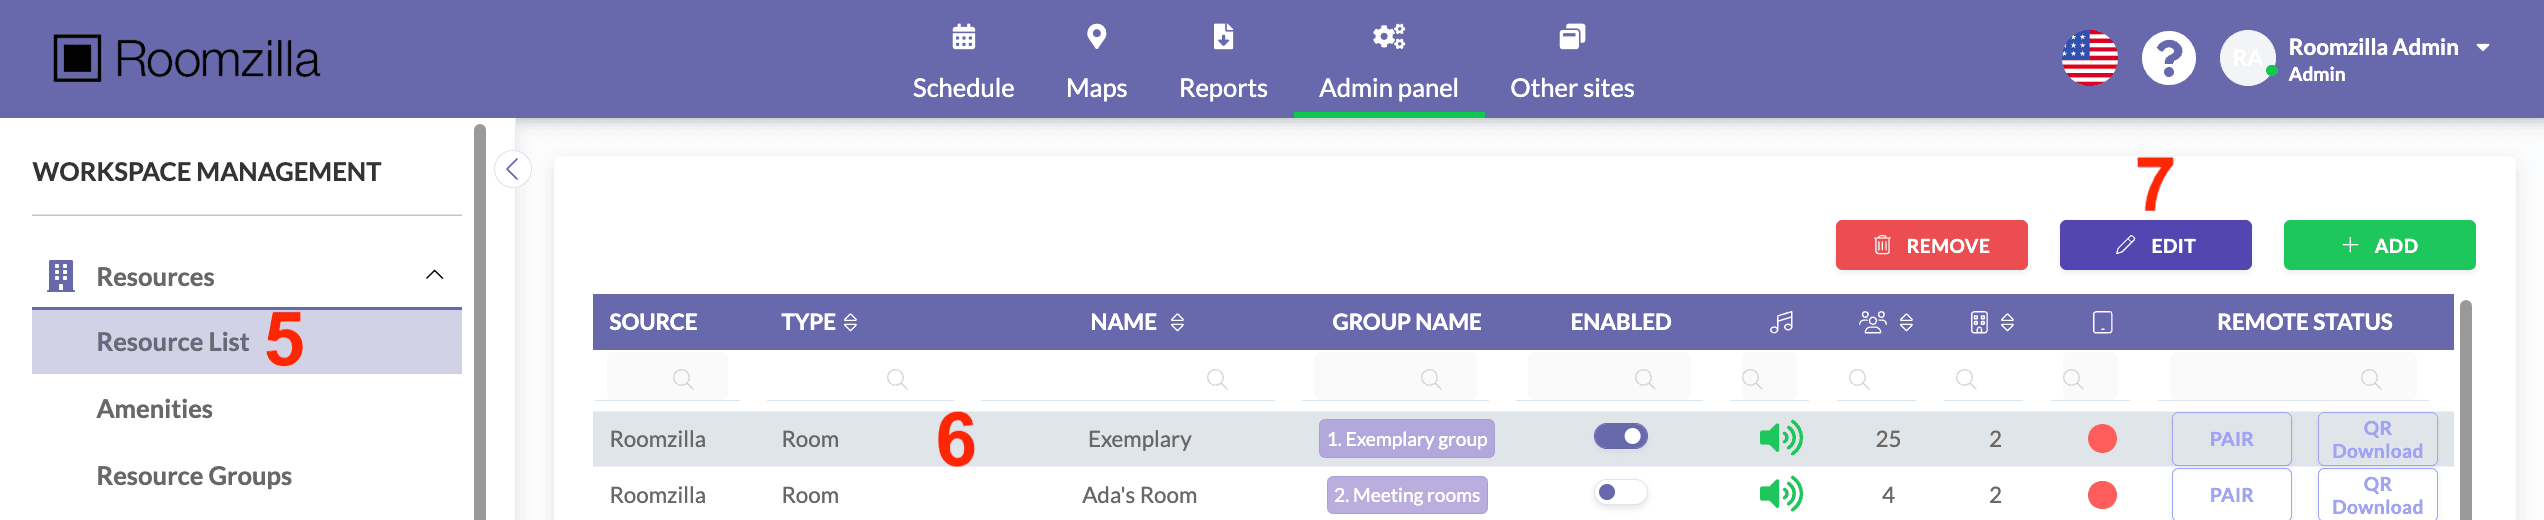
1. Head to Resource List [5], select a particular Resource you want to add to a Resource Group [6], and hit Edit [7]:
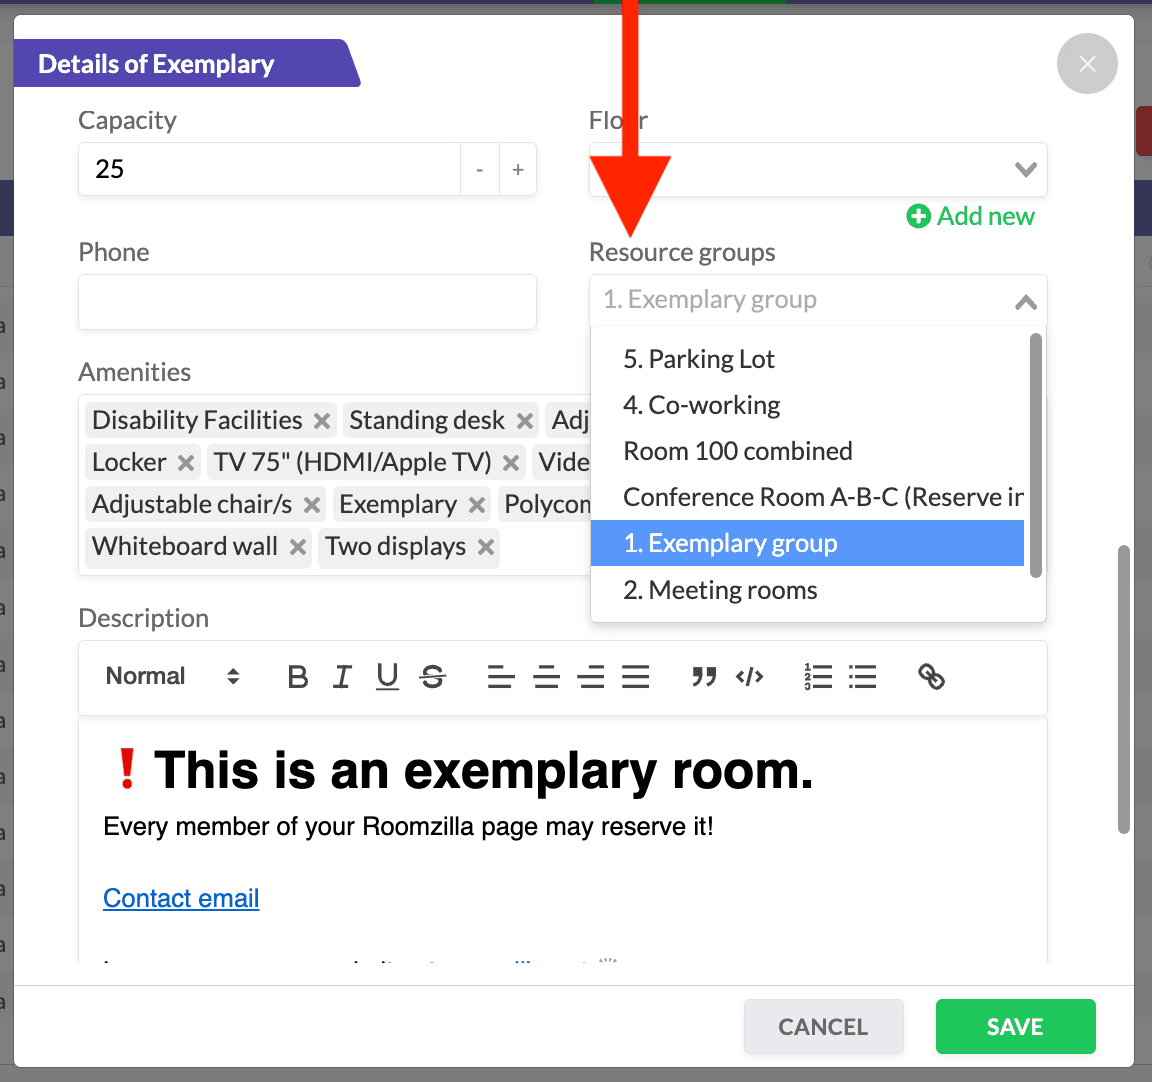
2. On the right-hand side, you will see the Resource Groups option; you may need to scroll down. Select the box and pick the desired group from the drop-down list.
3. Click Save to confirm changes.
Now you have created your Groups and chosen which Resources will be within them, they will be displayed on a full web app’s timeline [1] and mobile version, allowing your Users to quickly collapse unsuitable Groups [2]. Hiding resources they are not interested in reserving will result in a clearer view:

