Reservation Host management
Assigning Host to a reservation
Learn here how to create a reservation on behalf of another user. This allows admins to simplify the booking process for team members while retaining control. The assigned host will receive confirmation emails regarding reservations and will have the ability to manage them.
1. To get things started, log in to your admin account and head to the “Schedule” tab [1].
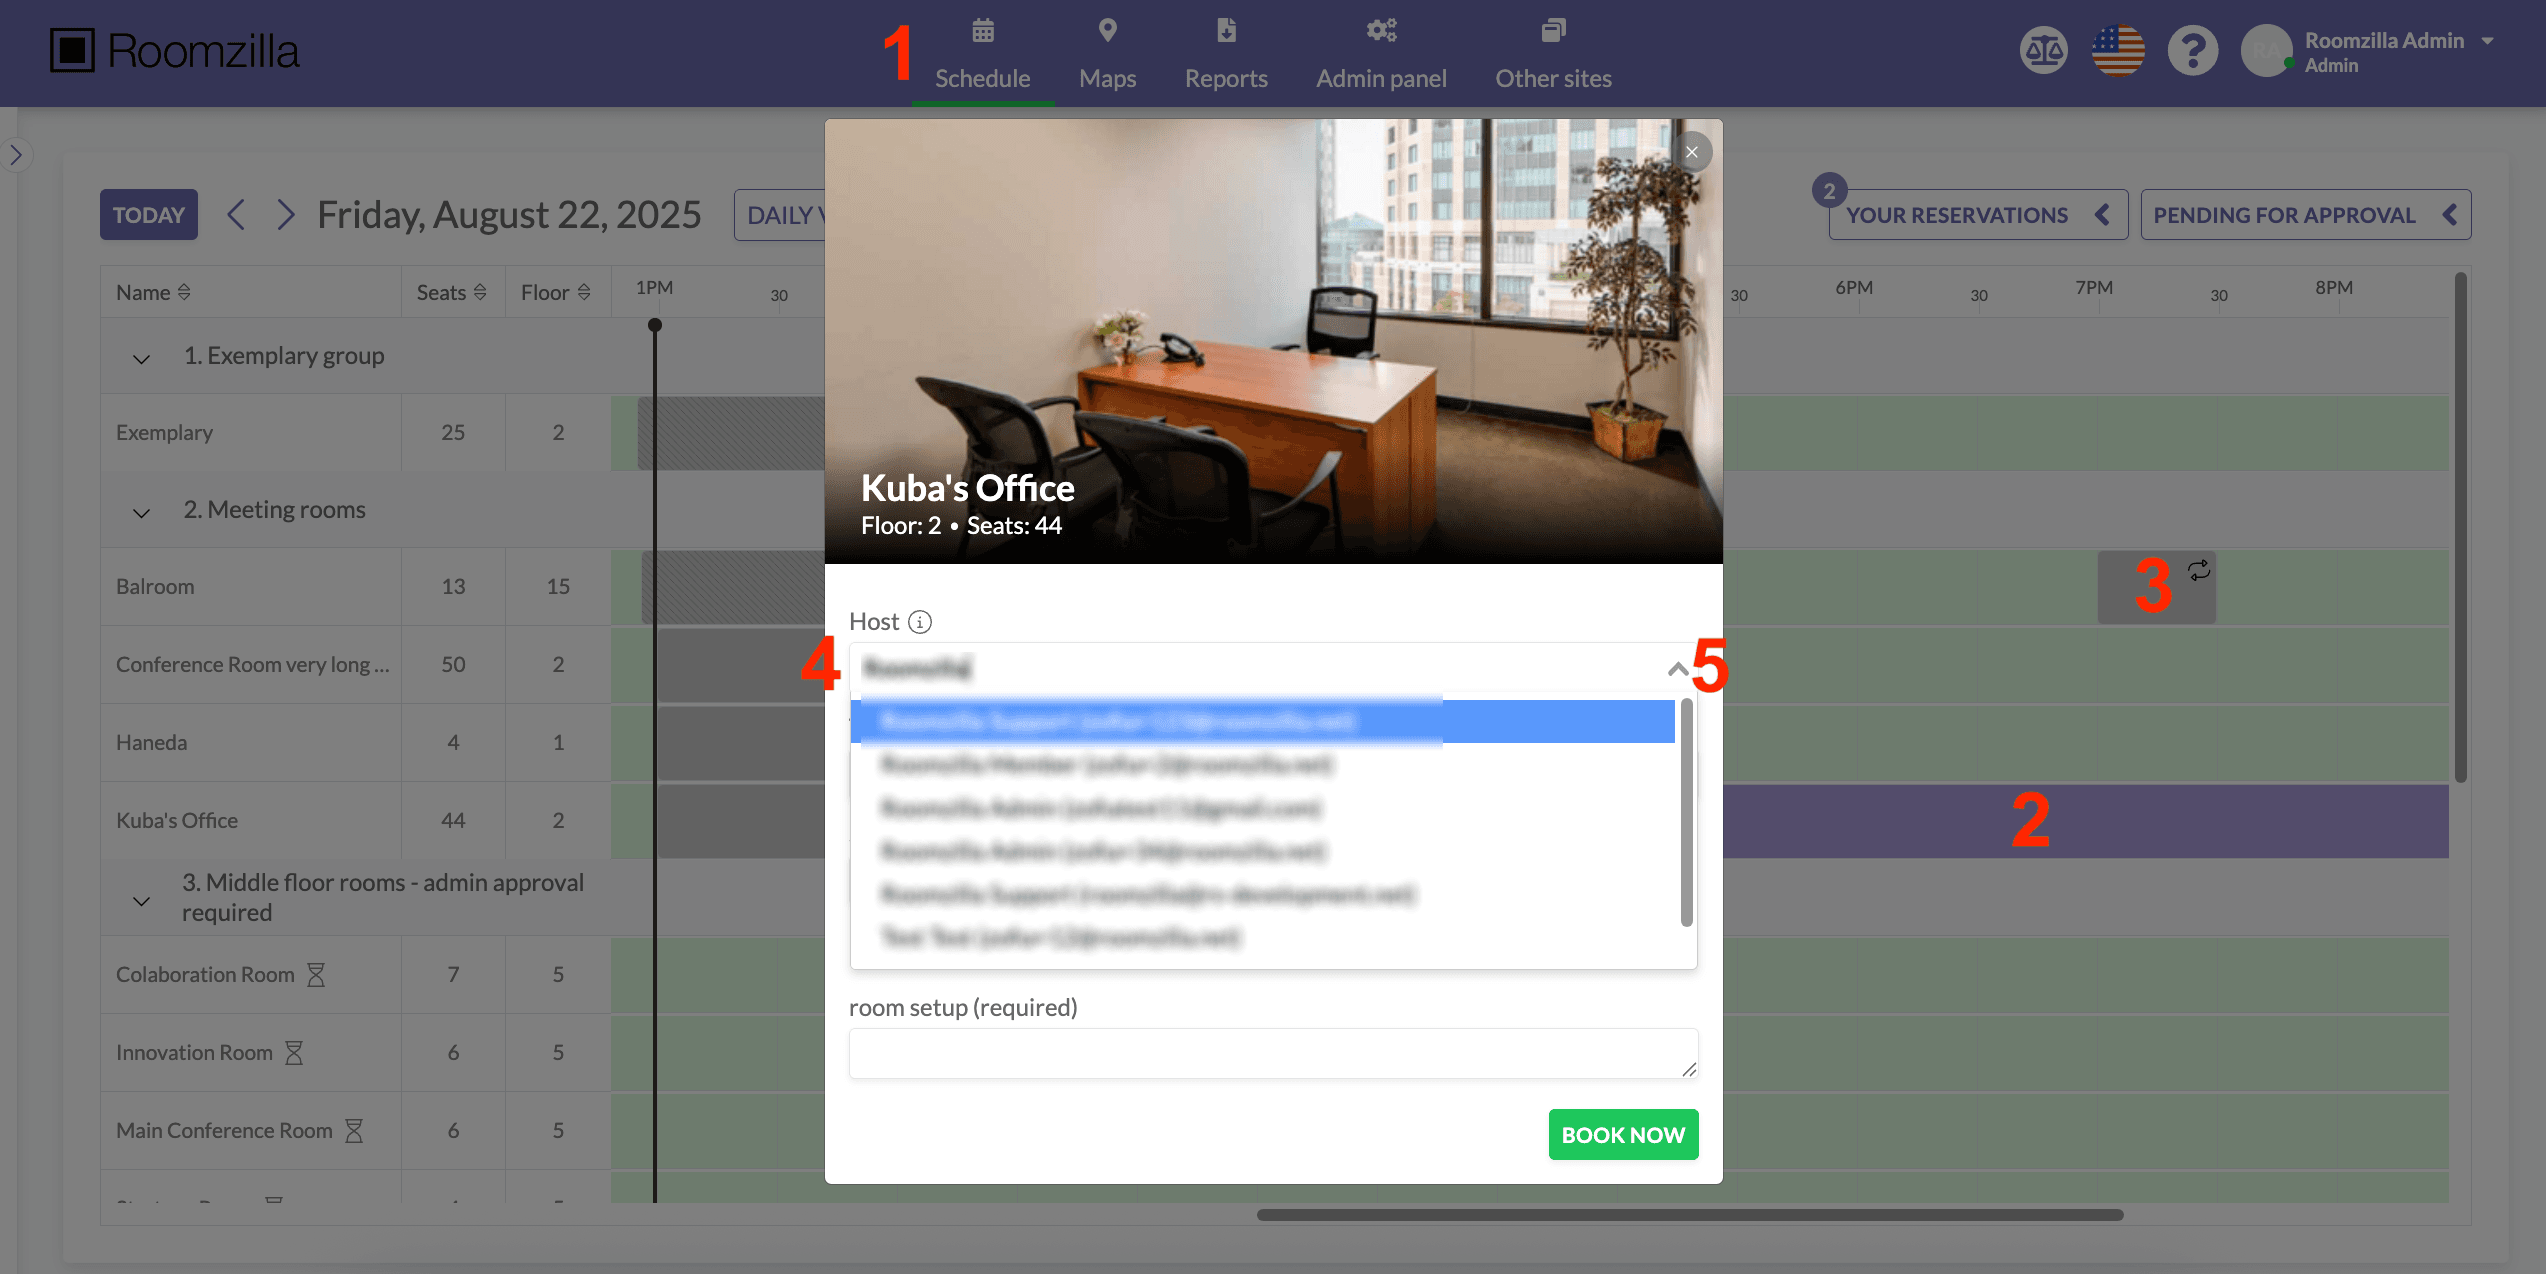
2. Click or click&drag on the timeline in the desired resource’s row [2] to open the reservation creation form, or select an existing reservation you want to reassign to another host [3].
3. In the “Host” field [4], begin entering the user’s details (first/last name or email address) to whom you’d like to assign the reservation. This action will unveil a drop-down list [5] from which you can then choose a host.
4. Fill in the remaining reservation details and hit the “Book now” or “Save changes” button to confirm.
5. Done! The reservation will be assigned to the selected user, who will receive email notifications.
The following aspects are worth noting:
- This action is available only for Users with an Admin role.
- Only single reservations can be reassigned to another user.
- Host of a single reservation can be changed multiple times.
- Repeating reservations can be assigned to other users only during reservation creation. This option is available in the reservation creation window but not when editing a repeating reservation.